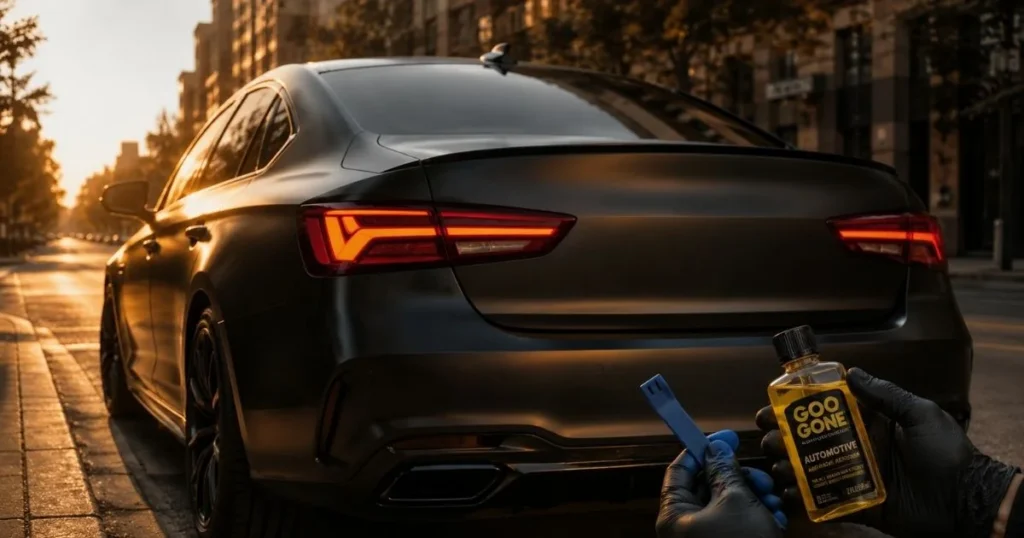
You can absolutely remove a car emblem without damaging paint — but only if you use the right tools, the right heat, and the right sequence. As a certified auto detailer with over eight years of hands-on experience debadging everything from daily drivers to luxury vehicles, I’ve seen people get this perfect in 20 minutes — and I’ve seen others scratch their clear coat beyond repair in the first 60 seconds.
This guide covers everything: tools, prep, the exact removal method, how to clean up stubborn adhesive residue, and — the part almost no one talks about — how to fix the ghost shadow that appears after the emblem is gone.
Time required: 30–60 minutes
Skill level: Beginner-friendly
Tools cost: $15–$60 depending on what you already own
What You Need Before You Remove a Car Emblem Without Damaging Paint
The most common mistake people make is grabbing whatever’s nearby and just going for it. Starting without the right tools is how you end up with a scratched clear coat or a permanently visible outline where your badge used to be.
Here’s the full picture — before you touch the emblem, run through these three checks.
Step 0: Check Whether Your Emblem Is Adhesive or Pin-Mounted
This is the step that almost every online guide skips — and it’s the one that causes the most damage.
Most modern emblems are held on by double-sided foam adhesive tape. But many hood ornaments, trunk lid badges on older vehicles, and OEM logos on certain European and domestic cars are actually pin-mounted — meaning they pass through the body panel and are held from the inside by nuts or clips.
How to check:
- Open your hood or trunk and look directly behind where the emblem sits
- Feel for any protruding pins, bolts, or retaining clips
- If you see them: unscrew or unclip from the inside first, then lift the emblem out from the front
- Attempting to pry or slice a pin-mounted emblem will bend your body panel or crack the emblem — and no amount of heat will help
If it’s adhesive-only, carry on. If it’s pin-mounted, skip straight to Step 4 after removing the fasteners from inside.
The Complete Tool List
You don’t need an expensive kit. Most of this you may already have at home.
| Tool / Material | Purpose | Estimated Cost |
|---|---|---|
| Plastic trim tool / pry tool | Lifting the badge without scratching | $5–$10 |
| Hair dryer or heat gun | Softening the adhesive | $0 (hair dryer) / $20–$40 (heat gun) |
| Dental floss or 20 lb test fishing line | Slicing through adhesive cleanly | $2–$5 |
| Goo Gone Automotive / 3M Adhesive Remover | Dissolving residue | $8–$15 |
| Microfiber cloths (2–3) | Applying remover, buffing | $5–$10 |
| Clay bar | Smoothing surface after residue removal | $10–$20 |
| Cutting compound (e.g., Meguiar’s, Chemical Guys) | Fixing paint ghosting | $10–$20 |
| DA polisher (optional) | Faster, more even correction | $60–$150 |
| Finishing polish | Restoring gloss after compounding | $10–$20 |
| Car wax or paint sealant | UV protection on exposed paint | $10–$30 |
| Painter’s tape | Protecting surrounding paint from remover | $3–$6 |
Safety note: If you’re using a heat gun, never hold it stationary. Keep it moving at all times, held 4–6 inches from the surface. Even two to three seconds in one spot at high heat can bubble your clear coat — damage that costs hundreds to repair.
Is Your Paint Matte, Wrapped, or Single-Stage? Read This First
Standard clear-coated paint (the vast majority of cars made after 1995) handles this process well. But three paint types need special attention:
Matte or satin finish paint: Never use standard wax, polish, or cutting compound on matte paint. These products fill in the micro-texture that creates the flat look, leaving permanent glossy patches. Use only matte-safe detailing products. Heat application should also be lower and more cautious — a hair dryer on a low setting is safer than a heat gun.
Vinyl-wrapped cars: If the emblem sits on top of a wrap, the process is nearly identical — but aggressive adhesive removers can lift or cloud the vinyl edges around the badge. Use a citrus-based solvent and test on an inconspicuous corner first.
Single-stage paint (common on vehicles pre-1990s and some commercial trucks): There is no separate clear coat layer. Any polishing or compounding goes directly into the color coat. Work very lightly, and if in doubt, consult a body shop before proceeding.
Whether you’re refreshing a daily driver or starting a full custom build, this is just one piece of the puzzle. Head over to our complete guide on custom car emblems for everything you need to know about personalising your vehicle from start to finish.
Step-by-Step: How to Remove a Car Badge Without Scratching the Paint
This is the core of it. Follow the sequence exactly — every step feeds into the next.
Step 1 — Wash and Prep the Area
Clean the entire badge area and a 6–8 inch radius around it with car wash soap and water. Rinse and dry completely with a microfiber cloth.
Why this matters: Any grit or dirt on the surface acts like sandpaper the moment you start applying pressure or moving tools across the paint. I’ve seen people skip the wash and drag a single piece of road grit straight across the clear coat — one long scratch that needed machine polishing to fix.
Apply strips of painter’s tape along the edges of the emblem on the paint side. This gives your tools a physical barrier to rest against.
Step 2 — Apply Heat to Loosen the Adhesive
Hair dryer: Hold it 4–6 inches from the badge surface. Move it in small, slow circles for 60–90 seconds. Check the adhesive by gently pressing the corner of the badge — if it flexes slightly, it’s ready.
Heat gun: Use the lowest setting. Keep it moving constantly, 4–6 inches away, for no more than 30–45 seconds. Then check. Repeat if needed. Never go beyond 60 seconds in a single pass without letting the area cool.
The goal is to bring the adhesive to roughly 120–150°F — warm enough to become pliable, not hot enough to soften the paint or clear coat underneath it.
Pro tip: If you’re working in cold weather, heat the emblem for 20% longer than usual. Cold adhesive is far more brittle and will tear chunks out rather than releasing cleanly.
Step 3 — Use Fishing Line or Dental Floss to Slice Through the Adhesive
This is the fishing line emblem removal method — and it’s the safest technique for beginners because it never contacts the paint.
Cut a piece of 20 lb test fishing line (or unflavored dental floss) about 24 inches long. Wrap each end around your index fingers, leaving about 8–10 inches of working length between them.
Slide the line behind one corner of the emblem at a shallow angle — almost parallel to the paint surface, not perpendicular. Work it back and forth with light, even strokes, moving progressively across the badge like you’re sawing through it in slow motion.
Don’t force it. If you meet heavy resistance, stop and apply more heat. Forcing the line tears the adhesive rather than separating it cleanly, and that leaves a much messier residue behind.
Pro tip: Work from the outside edges toward the center, never from the center outward. This prevents the line from catching on the edge of the double-sided tape and dragging it across the paint.
Step 4 — Gently Pry With a Plastic Trim Tool
Once the fishing line has worked through most of the adhesive, the emblem should be sitting loosely. Slide the flat edge of a plastic trim tool under one corner — keeping it nearly flat against the body panel, not angled steeply upward.
Apply slow, even lifting pressure. The emblem should peel away cleanly. If it resists, don’t force it — go back to the heat gun for another 20 seconds on that section.
Never use a metal scraper, putty knife, or flathead screwdriver. Even wrapped in tape, metal edges are harder than your clear coat and will scratch it. I’ve personally repaired clear coat damage caused by exactly this — it’s a preventable mistake.
For pin-mounted emblems where you’ve already removed the interior fasteners: simply lift the emblem straight out from the front. No prying needed.
Step 5 — Remove Adhesive Residue Safely
Once the badge is off, you’ll almost always find a layer of foam adhesive residue left on the paint. This is normal. Don’t panic — and don’t scrape it.
Method 1 — Adhesive remover soak: Apply Goo Gone Automotive or 3M Adhesive Remover directly onto the residue with a microfiber cloth. Let it sit for 60–90 seconds to dissolve the adhesive polymers. Then wipe in one direction — not in circles — with light pressure. Repeat until the surface feels smooth.
Method 2 — Eraser wheel (for stubborn residue): Attach an eraser wheel to a cordless drill and run it at 2,000–3,000 RPM. Keep the wheel moving constantly across the residue. This rubber compound is specifically designed to lift adhesive without contacting or harming the clear coat. It’s faster than the soak method and works well on thick foam tape residue.
After either method, wipe the area with a clean microfiber dampened with isopropyl alcohol to remove any solvent residue before moving to the next step.
Comparing Your Options: Adhesive Remover Products Head-to-Head
Not all adhesive removers are created equal. Here’s how the most common options stack up — and which ones I’d actually reach for.
| Product | Safe on Clear Coat? | Speed | Cost | Availability | Notes |
|---|---|---|---|---|---|
| Goo Gone Automotive | ✅ Yes | Medium | ~$8 | Widely available | My go-to for most jobs. Citrus-based, gentle on clear coat. In my testing, it dissolved 2-year-old foam tape in under 90 seconds. |
| 3M Adhesive Remover | ✅ Yes | Fast | ~$12–$15 | Auto parts stores | Professional-grade. Works faster than Goo Gone but slightly more aggressive — don’t leave it sitting too long. I use this for stubborn dealer badge residue. |
| WD-40 Specialist | ⚠️ Use cautiously | Slow | ~$6 | Everywhere | Better than nothing, but not formulated for clear-coat safety. Use sparingly and rinse quickly. |
| Citrus-Based Solvent | ✅ Yes | Medium | ~$10 | Online, auto stores | Great for wrapped vehicles. Lower risk of edge-lifting than petroleum-based options. |
| Eraser Wheel (drill) | ✅ Yes | Fast | ~$10–$15 | Online | Best tool for large areas or thick tape. No chemical residue to clean up afterward. |
Once the old badge is off, the next real decision is what finish to go with. Check out our comparison on chrome vs. black emblems to figure out which look actually suits your build before you commit to anything.
Bottom line: For a beginner, Goo Gone Automotive is the safest starting point. For efficiency, pair it with a 3M Adhesive Remover follow-up on stubborn spots.
How to Fix the Ghost Shadow Left After Emblem Removal
Here’s the part nobody tells you about — and it’s the question I get asked most often after someone removes a badge for the first time.
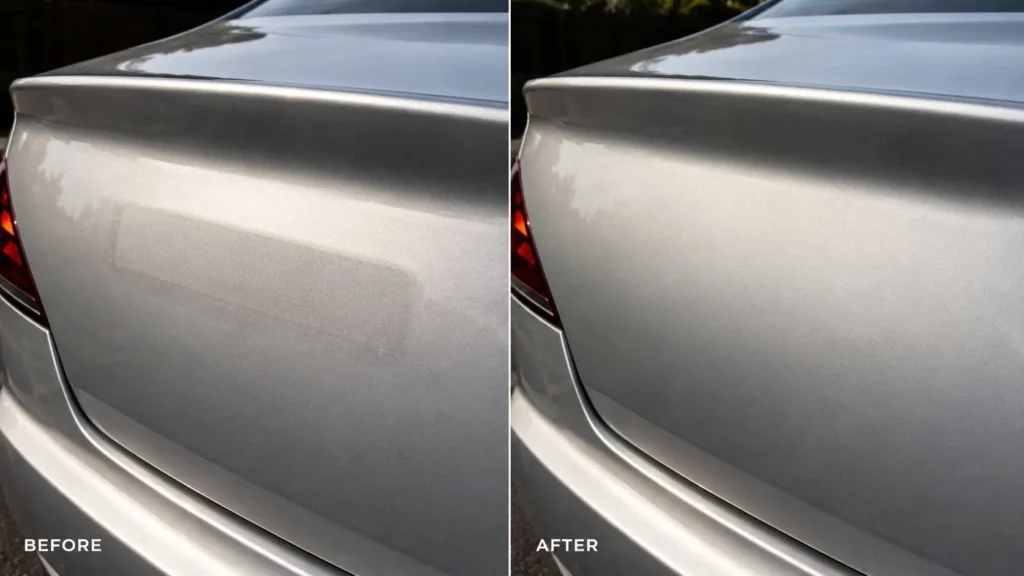
“I got the emblem off perfectly, but there’s still an outline where it used to be. What did I do wrong?”
You didn’t do anything wrong. This is called paint ghosting or badge shadowing, and it’s caused by physics — not technique.
Why Paint Ghosting Happens
For years, the emblem acted as a physical UV shield over a small section of your paint. The paint under the badge retained its original color and depth, protected from sunlight. The paint around the badge, meanwhile, slowly faded and oxidized from continuous UV exposure.
When the badge comes off, you’re suddenly seeing two different versions of your own paint side by side — the original, unfaded paint underneath, and the slightly oxidized surrounding paint. The contrast creates the outline, even though the paint surface itself is perfectly smooth.
The more time a car has spent in the sun — and the older the car — the more pronounced the ghost will be. A three-year-old garage-kept car may show almost no ghosting. A ten-year-old car parked outdoors in a sunny climate could have a very visible shadow.
Can You Fix It Yourself?
In most cases, yes — with the right products and patience.
The process:
- Clay bar the area — First, run a clay bar over the area with clay lubricant spray. This removes any bonded surface contaminants that could interfere with polishing.
- Apply cutting compound — Use a cutting compound (Meguiar’s Ultimate Compound, Chemical Guys V36, or Adam’s Polishes One Step Correction are all solid choices) on a foam cutting pad. Work it in an overlapping cross-hatch pattern over the ghost zone and the surrounding 4–6 inches of paint.
- Machine polish with a DA polisher — A dual-action polisher works the compound evenly without the risk of burning through the clear coat (unlike a rotary). Run it at medium speed, keeping the pad flat and moving continuously. The goal is to gently level the surrounding oxidized paint to match the fresher paint underneath the ghost zone.
- Finishing polish — Follow with a finishing polish (Griots Garage One Step, Chemical Guys Butter Wet Wax-compatible polish) to restore gloss and remove any micro-marring from the cutting compound.
- Wax or paint sealant — Seal the whole panel. Don’t just spot-treat the ghost area — the entire panel needs a uniform protective coat to prevent the ghost from re-appearing as sun exposure continues.
Pro tip: Use a bright flashlight or work light at a low angle to inspect the ghost zone from multiple directions. Compound until you can no longer see the outline from any angle before moving to the finishing polish.
Removing factory badges on a truck comes with slightly different challenges given the size and placement. If that’s what you’re working on, our guide to custom truck emblems and tailgate badges covers what to expect before and after the swap.
When to Take It to a Professional Detailer or Body Shop
Polishing will significantly reduce or eliminate ghosting in most cases — but not always.
Go to a professional if:
- The ghost is still clearly visible after two rounds of compounding and polishing
- The paint underneath the badge is a dramatically different color (not just slightly brighter)
- Your car has single-stage paint and you’re not experienced with compound correction
- The vehicle is high-value and you can’t afford to risk burning through the clear coat
In cases of severe paint fade differential, the only complete solution is a professional blend repaint — where a body shop repaints and blends the affected panel. It’s not cheap, but it’s the only way to achieve a perfect, factory-uniform color across the whole panel.
After Removal: Protect Your Paint Like a Pro
The fresh paint now exposed where your emblem used to be has had zero UV exposure — it’s essentially in original condition. That’s great news. But it also means it needs protection immediately, because it will catch up with the surrounding paint faster than you’d expect once sun exposure begins.
At minimum: Apply a quality car wax after completing the polishing steps. Turtle Wax Ice, Meguiar’s Gold Class, or Adam’s Polishes Butter Wax all offer solid UV protection and are beginner-friendly.
For longer-lasting protection: A paint sealant (synthetic polymer-based) outlasts carnauba wax by 3–6 months and provides a stronger UV barrier. Chemical Guys JetSeal and Griots Garage Paint Sealant are both excellent options.
For serious protection: A ceramic coating applied over the entire panel — not just the badge area — gives you 2–5 years of UV, chemical, and scratch resistance in a single application. It also creates a hydrophobic surface that makes future washing much easier.
Premium option: If you’re already debadging for a wrap or want maximum paint protection, paint protection film (PPF) installed over the debadged panel offers the highest level of physical and UV protection available, including self-healing properties on minor scratches.
Whatever you choose, don’t leave the newly exposed area bare for more than a day or two. Unprotected paint oxidizes faster than you’d think, especially in sunny climates.
If you’re removing an old emblem to replace it with something fully custom, you’ll want your artwork ready to go. Our guide on how to create a vector logo for your emblem order makes sure your design is production-ready before you submit anything.
When You Should NOT Remove a Car Emblem Yourself
Knowing when not to do something is just as important as knowing how. Here are the red flags that mean you should call a professional instead of going DIY.
Stop and get professional help if:
- Your car has single-stage paint. Common on pre-1990s vehicles and some commercial trucks. There’s no clear coat buffer — mistakes go directly into the color. One wrong move with a heat gun or compound can permanently damage the finish.
- The car is more than 10 years old and primarily parked outdoors. Severe UV fade differential means ghosting after removal will almost certainly require professional paint correction or blending — the DIY polish approach won’t be enough.
- The emblem is chrome-plated and inset into the body panel. These are almost always pin-mounted and recessed — removing them leaves visible holes that require body filler and a professional repaint to fix properly.
- You drive a leased vehicle. Debadging is a modification. At lease return, the dealer may flag missing or altered badges as non-standard wear, resulting in charges. Check your lease agreement or ask your dealer before you touch anything.
- Your car has a matte or satin factory finish and you’re not using matte-safe products. A single pass with the wrong polish will permanently gloss up your matte paint — and it cannot be undone without a full repaint or new wrap.
If any of these apply to your car, spending $100–$200 on a professional mobile detailer to do the removal is cheap insurance compared to a $500+ paint correction or panel repaint.
Frequently Asked Questions
Does removing a car emblem damage the paint?
What is the easiest way to remove a car emblem?
Will WD-40 remove car emblems?
How do I remove emblem glue from a car?
Is debadging a car reversible?
Can I remove a car emblem with a hair dryer?
Final Thoughts on Removing a Car Emblem Without Damaging Paint
Learning how to remove a car emblem without damaging paint comes down to three things: the right tools, the right heat, and the right patience.
The fishing line method with gentle heat is the safest combination for almost every car and every skill level. Add a quality adhesive remover, a microfiber cloth, and a proper wax at the end — and you’ve got a clean, professional result in under an hour.
The part most people don’t plan for is the ghost shadow. If your car has spent any significant time in the sun, be ready to spend extra time on the compound and polish steps. It’s not a failure — it’s just the last mile of the job.
And if you’re ever unsure about your specific paint type, your car’s age, or how severe the ghosting might be — reach out to a professional detailer before you start. A 15-minute conversation can save you a very expensive mistake.
Removing and replacing emblems across multiple vehicles at once is a whole different operation. Our guide on custom emblems for dealerships and fleet vehicles breaks down how to handle badge swaps at scale without things getting messy.
Have questions about your specific car or paint type? Drop them in the comments — I read every one.