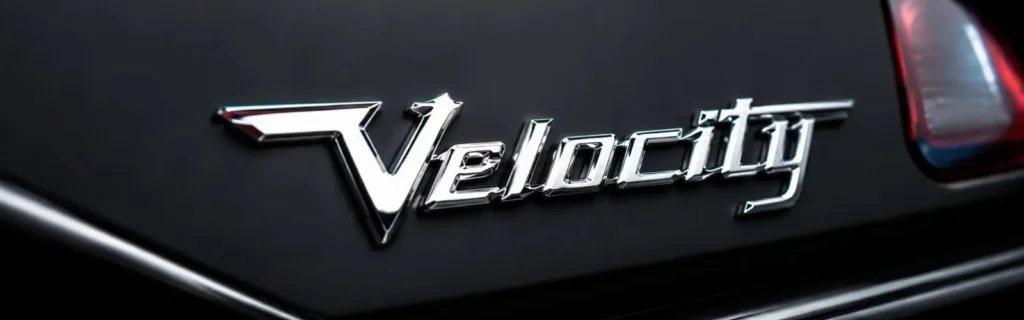
There are a thousand ways to modify a car. New wheels, a fresh wrap, tinted windows — but nothing signals intention quite like a custom car emblem. Small in size, outsized in impact. Whether you’re restoring a 1967 Mustang to factory-correct spec, building a show truck with your own logo on the tailgate, or branding a 20-vehicle corporate fleet, a custom emblem is the detail that separates finished from forgettable.
The problem? Most buyers approach the market blind. They don’t know the difference between a gel badge and a chrome-plated zinc piece, they submit a JPEG when the manufacturer needs a vector, and they order from the cheapest supplier — then wonder why the emblem starts peeling after its first winter.
This guide fixes all of that. We’ll walk you through every type of custom car emblem available today, the materials that actually last, the design process (including the file formats manufacturers need), a step-by-step installation guide, and a clear-eyed buying checklist. By the end, you’ll know exactly what to order, who to order it from, and how to make it stick — literally.
What Are Custom Car Emblems?
A custom car emblem is a personalised badge, nameplate, or logo mounted on a vehicle’s exterior — typically the grille, trunk lid, fender, or hood. Unlike factory badges, which identify the make and model, a custom automotive badge expresses something about you: your brand, your club, your build ethos, or simply your aesthetic.
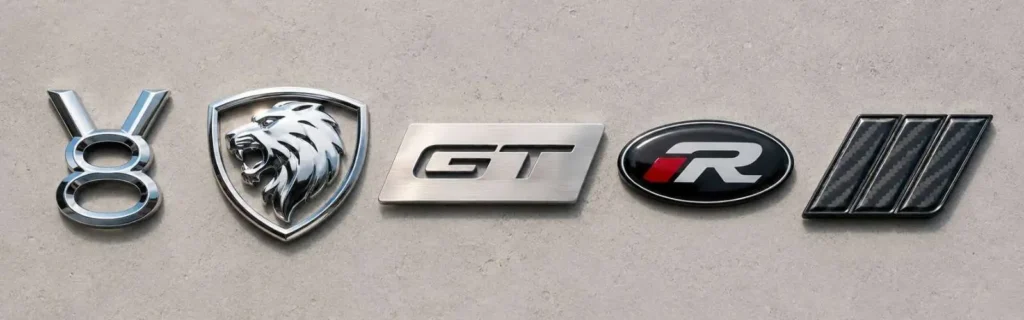
Custom emblems exist on a spectrum. At one end, you have simple chrome lettering — a name or a wordmark applied to the boot lid. At the other, you have fully sculpted 3D badges in die-cast zinc alloy, chrome-electroplated and colour-filled, matching the quality of anything that rolled off a production line in Stuttgart or Maranello.
Emblems vs. Decals vs. Badges — What’s the Difference?
These terms are often used interchangeably, but they’re not the same thing:
- Decals / stickers — vinyl graphics applied flat to a surface. Affordable, easy to change, but visually thin and prone to edge-lift over time.
- Badges — raised, three-dimensional hardware pieces. Typically made from plastic or metal, mounted with adhesive or mechanical studs. Longer-lasting and more premium in appearance.
- Emblems — essentially a synonym for badges in automotive contexts, though the term carries slightly more heritage weight (OEM logos are almost universally called emblems).
For the purposes of this guide, “custom car emblems” means raised, three-dimensional hardware — not vinyl.
Why Personalise Your Vehicle With a Custom Emblem?
The reasons are more varied than you’d expect:
- Enthusiasts want to represent a car club, a build theme, or a personal brand
- Restorers need replica OEM emblems that are no longer in production
- Fleet managers want consistent, professional badging across multiple vehicles
- Car dealers use custom emblems as a subtle, durable branding tool
- Motorsport teams badge everything — trailers, race cars, support vehicles
Whatever the motivation, a well-executed emblem adds a layer of intentionality that other modifications simply can’t replicate.
Before you can apply anything new, the old emblem has to come off cleanly — and rushing it is how paint jobs get ruined. If you’re not sure where to start, our guide on how to remove a car emblem without damaging paint walks through every tool and technique you need. Getting this step right sets the foundation for a flawless finish.
Types of Custom Car Emblems
Not all custom emblems are made the same way, and the type you choose will determine the look, durability, and cost of the finished piece. Here’s a breakdown of the main categories.
3D Chrome Emblems
The most popular option, and for good reason. Three-dimensional chrome car badges have depth, shine, and the unmistakable quality feel of an OEM part. They’re typically produced from ABS plastic or zinc alloy with a chrome electroplated or vacuum-metallised surface finish.
Best for: Enthusiast builds, personalised nameplates, show vehicles
Key advantage: Premium look at a relatively accessible price point
Limitation: Brushed chrome finishes are common at small quantities; mirror-finish chrome typically requires 300+ unit production runs
Flat Metal and Laser-Cut Emblems
Laser-cut from aluminium or stainless steel plate, these emblems are polished or brushed to a clean, industrial finish. They tend to sit lower-profile on the vehicle surface and suit modern, minimalist aesthetics particularly well.
Best for: Custom text emblems, truck tailgate badges, sleek modern builds
Key advantage: Extremely durable; stainless steel resists corrosion in any climate
Limitation: Limited to 2D shapes unless combined with layering techniques
Gel Badges and Epoxy Domed Emblems
Gel badges are flat-printed graphics encased in a clear polyurethane dome. The dome gives them a soft 3D appearance and self-seals against moisture ingress. They’re lighter than metal badges and allow full-colour printing, making them ideal for complex logos.
Best for: Corporate fleet vehicles, full-colour logo reproduction, dealership branding
Key advantage: Full-colour capability at low minimum order quantities
Limitation: The gel dome can yellow under prolonged UV exposure if not UV-stabilised
Colour-Fill Enamel and UV-Printed Emblems
These are typically metal (zinc alloy or brass) pieces with recessed areas filled with coloured enamel — similar to a coin or medallion. UV printing offers an alternative for finer colour detail on flat metal surfaces.
Best for: Motorsport clubs, heritage-inspired designs, car shows
Key advantage: Rich, durable colour with a handcrafted feel
Limitation: Higher per-unit cost; colour accuracy requires good artwork
Carbon Fibre and Acrylic Emblems
Carbon fibre emblems (genuine or carbon-look acrylic) suit performance and sport-themed vehicles. Acrylic emblems cut from UV-rated sheet can be layered for a clean stacked 3D effect without the tooling costs of injection moulding.
Best for: JDM builds, track cars, modern sports vehicles
Key advantage: Lightweight; UV-rated acrylic variants are highly resistant to fading
Limitation: Carbon fibre can be expensive; acrylic lacks the weight and resonance of metal
The finish alone can shift your car’s entire look from showroom classic to stealthy street build. We put together a full breakdown on chrome vs. black emblems covering durability, maintenance, and which finish actually complements different paint colours. It’s one decision that’s worth getting right before you order.
Materials Guide: Durability and Finish Comparison
The material your emblem is made from determines how long it lasts, how it weathers, and how it feels to the touch. Here’s what you need to know about each option.
ABS Plastic and Chrome-Plated Resin
ABS (acrylonitrile butadiene styrene) is the dominant material in both OEM and aftermarket emblems. It’s lightweight, accepts chrome plating well (via vacuum metallisation), and is cost-effective to produce.
The catch: ABS emblems plated via vacuum metallisation can begin to flake or cloud under sustained UV exposure, especially in hot climates. Premium ABS emblems use UV-stabilised base material and thicker chrome coatings to extend lifespan. A well-made ABS emblem should last 3–5+ years; a budget import may show degradation within 18 months.
Zinc Alloy and Die-Cast Metal
Zinc alloy (also referred to as Zamak) is the go-to material for high-quality 3D car badges. It’s heavier than plastic, accepts chrome electroplating beautifully (giving that true mirror-like OEM quality), and holds fine detail from the die-casting process.
Zinc emblems feel premium in hand and on the car — they don’t flex, don’t hollow-sound, and hold their finish significantly longer than plastic. The trade-off is weight (relevant for large pieces) and cost (expect to pay more per unit).
Stainless Steel and Aluminium
Stainless steel is the undisputed durability champion for automotive emblems. It’s corrosion-resistant in road-salt environments, UV-stable, and can be polished, brushed, or powder-coated. Aluminium shares many of these advantages at a lower weight.
Both materials are well-suited to laser cutting and CNC milling, which makes them popular for custom text emblems and flat badge designs. If you live in a coastal, high-humidity, or winter-salt environment — stainless steel is your material.
How to Pick the Right Material for Your Climate
| Climate Type | Recommended Material | What to Avoid |
|---|---|---|
| Hot, high-UV (desert, tropics) | UV-rated acrylic, zinc alloy | Thin-plated ABS |
| Coastal / high humidity | Stainless steel, anodised aluminium | Standard ABS |
| Cold / road salt | Stainless steel | Chrome-plated zinc without sealing |
| Mild / temperate | Any — ABS, zinc alloy, acrylic | — |
| Indoor show cars | Any | — |
Trucks carry a different energy, and the badging needs to match that. Take a look at our dedicated guide on custom truck emblems and tailgate badges if you want options that are built around the scale and attitude of a truck specifically. Stock badges simply don’t do a personalised build justice.
How to Design Your Custom Car Emblem
The design stage is where most first-time buyers run into trouble. Getting this right upfront saves weeks of back-and-forth with manufacturers and ensures the finished emblem matches your vision.
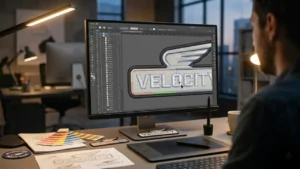
Creating a Vector File (What Manufacturers Need)
Almost every professional emblem manufacturer will ask for a vector file. This is non-negotiable for quality production.
A vector file is a mathematical description of shapes and lines — as opposed to a raster/pixel image (JPEG, PNG). Vector files scale to any size without losing quality, which is essential for accurate tooling and cutting.
Accepted formats:
- .AI (Adobe Illustrator) — the gold standard
- .EPS (Encapsulated PostScript) — universally accepted
- .SVG (Scalable Vector Graphics) — increasingly accepted
- .PDF (vector-based, not flattened) — widely accepted
What to avoid: Sending a PNG or JPEG of your logo. Even a high-resolution raster image cannot be traced perfectly, and manufacturers who accept them are cutting corners. If your logo only exists as a raster file, use a tool like Adobe Illustrator, Inkscape (free), or a conversion service to vectorise it first.
Shape, Size, and Placement Considerations
Before you finalise your design, answer these questions:
- Where will it go? Grilles, trunks, and fenders each have different surface curvature — your emblem needs to account for this
- How big? Most car emblems range from 3–8 inches in their longest dimension. Bigger isn’t always better; scale to the surface
- 3D or flat? 3D designs require production tooling (die, mould, or layered acrylic stacking) and affect cost significantly
- Mounting method? Adhesive-only designs need a clean, flat or gently curved surface; larger pieces may benefit from stud mounting
Font Choices for Legible Car Emblems
If your emblem includes text, legibility at vehicle-viewing distance (3–15 feet) is paramount.
- Avoid ultra-thin script fonts — fine strokes get lost at small sizes and are difficult to produce cleanly in metal
- Prefer medium-weight sans-serifs or classic serif letterforms for readability
- Script fonts work well for names and signatures but need a minimum stroke width (ask your manufacturer for their minimum)
- Letter spacing — open up the tracking slightly for metal emblems; tighter spacing looks great on screen but can cause adjacent letters to merge in physical production
Using a Design Service vs. Submitting Your Own Artwork
Most quality emblem manufacturers offer in-house design services. This is worth paying for if:
- You don’t have a vector file
- Your concept exists only as a sketch or rough idea
- You want a 3D render approval before production starts (many offer this as standard)
If you have professional brand assets, submitting your own artwork is faster and usually reduces per-unit cost.
The Manufacturing Process Explained
Understanding how your emblem is made helps you ask the right questions, set realistic expectations, and spot quality red flags.
Injection Moulding
The standard process for ABS plastic emblems. Molten plastic is injected into a steel mould under pressure, creating precise, repeatable parts. OEM automotive emblems are almost universally injection-moulded.
The catch for custom work: injection mould tooling is expensive ($1,500–$10,000+ depending on complexity), which is why manufacturers require minimum order quantities of 300+ for true injection-moulded production. At lower quantities, alternatives are used.
Die Casting
The metal equivalent of injection moulding — molten zinc alloy is forced into a steel die under high pressure. Die-cast zinc produces heavier, more dimensionally precise parts than plastic, with superior surface quality for chrome plating.
Die casting is the process behind the best-looking custom 3D car badges. Like injection moulding, tooling costs apply, but they’re often lower due to simpler geometries.
Laser Cutting and Engraving
Laser cutting is transformative for small-run custom emblems. A CNC laser cuts directly from a vector file — no tooling required — making it ideal for flat aluminium or stainless steel badges with no minimum order.
Laser engraving adds depth and detail to flat cut pieces: recessed text, textured backgrounds, and fine linework are all achievable. This process suits modern, industrial aesthetics and is common in the custom truck and off-road segment.
Chrome Electroplating vs. Vacuum Metallisation
Two different processes produce “chrome” finishes — and they’re not equal:
Chrome electroplating involves depositing real chromium metal onto a base material through an electrochemical process. It produces a true mirror finish, is extremely durable, and is the standard for OEM and high-end aftermarket pieces. Requires minimum quantities (typically 300+ units).
Vacuum metallisation (PVD coating) deposits a thin metallic layer onto plastic in a vacuum chamber. It mimics chrome visually but is thinner and more susceptible to chipping and UV degradation over time. Used for small-run and budget custom emblems.
If you want OEM chrome quality at small quantities, zinc alloy + electroplating is the closest you’ll get — but expect higher per-unit costs.
Your design is only as good as the file you submit — low-resolution artwork is the fastest way to end up with a blurry, disappointing badge. Before placing your order, read through our guide on how to create a vector logo for your custom emblem so your artwork comes out crisp and production-ready. Most manufacturers won’t even begin without it.
How to Install a Custom Car Emblem: Step-by-Step
Most custom emblems arrive with 3M automotive-grade adhesive tape pre-applied. Installation is a genuine DIY job — no professional fitting required — but preparation is everything.
Tools You’ll Need
- Isopropyl alcohol (70%+) and microfibre cloths
- Automotive adhesive remover (for removing old badges)
- Plastic trim tool or dental floss / fishing line (for removal)
- Heat gun or hair dryer
- Masking tape (for alignment marking)
- A ruler or tape measure
- The emblem itself
Step 1 — Remove the Old Emblem
If you’re replacing an existing badge, warm the adhesive from behind using a heat gun or hair dryer on medium heat for 30–60 seconds. This softens the foam tape and significantly reduces the risk of paint damage.
Use dental floss or a thin plastic trim tool — never a metal blade — to work behind the emblem slowly, using a back-and-forth sawing motion with the floss or gently levering with the trim tool. Work from one end to the other.
Step 2 — Clean the Surface Thoroughly
Once the old emblem is off, you’ll likely have adhesive residue remaining. Apply automotive adhesive remover (3M makes an excellent product) to a microfibre cloth and work in circular motions until the surface is completely clean.
Follow up with isopropyl alcohol on a fresh cloth. The surface must be completely free of wax, grease, polish, and residue — any contamination will dramatically reduce adhesive bond strength.
Important: Do not apply the new emblem immediately. Allow the surface to dry fully and come to ambient temperature (ideally 18–30°C / 65–85°F). Cold surfaces reduce initial adhesive tack.
Step 3 — Plan Your Alignment
This step is where rushed installers go wrong. Use masking tape to mark the exact position you want the emblem — both horizontal/vertical centre lines and the outer boundary. Use a ruler to check symmetry.
Many manufacturers include a 1:1 print template or send a digital render to actual size — print this and hold it against the car to check fit and position before committing.
Step 4 — Apply the Emblem
Peel the adhesive backing from the emblem. Position it carefully against your tape reference marks — once VHB (Very High Bond) tape contacts paint, it bonds immediately and repositioning without damage is difficult.
Apply firm, even pressure across the entire emblem surface for 30–60 seconds. For larger pieces, press from the centre outward to avoid trapping air.
Step 5 — Curing and Care
Most automotive adhesive tape reaches handling strength within 30 minutes but achieves full bond strength after 24–72 hours. Avoid car washing, rain, or pressure washing during this curing window.
Long-term care:
- Clean chrome emblems with a soft cloth and mild soapy water — avoid abrasive cleaners
- Apply wax around (not directly on) chrome-plated surfaces to prevent hazing
- Inspect annually for lifted edges; re-adhering early prevents water ingress under the emblem, which can blister paint
- If water is pooling behind the emblem, address it immediately
Custom Car Emblems for Specific Use Cases
Custom emblems work across a remarkably wide range of applications. Here’s how different buyer groups should think about the category.
Classic and Vintage Car Restoration Emblems
Restorers face a unique challenge: they need emblems that match originals precisely — correct profile, correct finish, correct attachment method — but for vehicles where OEM parts are no longer available or prohibitively expensive.
Custom emblem makers can work from photographs, dimensions, or original parts to produce faithful replicas. Zinc alloy with chrome electroplating is the closest match to original OEM quality. Demand for this service is consistent and underserved — most marketplace sellers don’t cater to it.
Key search terms to look for: replica car emblem, OEM emblem reproduction, vintage car badge restoration
Custom Truck and Off-Road Emblems
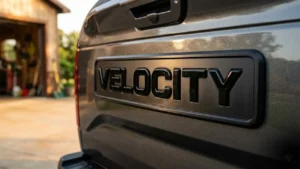
The truck segment is the single largest aftermarket emblem market. F-250, RAM 1500, Silverado, and Tacoma owners are enthusiastic modifiers, and custom tailgate lettering, grille badges, and fender emblems are high-demand items.
Popular options include custom text emblems in laser-cut stainless or aluminium (often as a de-badging alternative — remove OEM logos and replace with your own wordmark or name), 3D grille badges in black chrome or brushed finishes, and personalised custom fender emblems representing a build theme.
Business Fleet and Dealership Branding Emblems
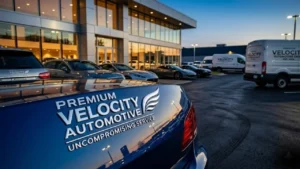
For fleet managers and dealerships, custom emblems are a professional branding tool. A subtle chrome badge carrying the company logo on every vehicle creates consistent brand presence that decals and vinyl wraps simply can’t match in longevity.
Gel badges are often the preferred format here — full-colour logo reproduction at low minimum order quantities makes them cost-effective for fleet runs of 20–200 vehicles. Chrome zinc badges are preferred for premium applications.
Dealerships frequently use custom trunk or grille badges with their own branding alongside OEM emblems. Lead time for fleet orders typically runs 4–8 weeks.
Motorcycle and Powersport Emblems
Custom emblems aren’t limited to four wheels. Fuel tanks, fairings, and side panels on motorcycles accept the same adhesive mounting systems as cars, and the exposed-metal aesthetic of many custom bikes suits chrome and brushed metal badges particularly well.
Vibrational loads on motorcycles demand strong adhesive bond strength — specify VHB tape (rated at the adhesive weight the emblem will experience) or stud-mount options for larger pieces.
JDM and Import Tuner Emblems
Japanese domestic market and import tuner culture has its own emblem vocabulary: Rising Sun motifs, custom kanji, track-day club logos, and de-badged grilles with a single, statement piece. The JDM segment leans toward black chrome, matte, or carbon-look finishes over traditional bright chrome.
Gel badges and UV-printed emblems work well here for full-colour cultural designs; laser-cut acrylic or stainless suits the cleaner, sleeker builds.
Ordering Guide: What to Expect
Ordering a custom emblem is more straightforward than most buyers expect — but there are a few things worth knowing before you commit.
Minimum Order Quantities and No-MOQ Options
The biggest barrier in custom emblem manufacturing has historically been minimum order quantities. Injection-moulded and electroplated production runs require significant tooling investment, making orders under 300 units economically unviable for many manufacturers.
However, the market has shifted significantly. Several specialist makers now offer genuinely no-minimum custom emblems using laser cutting, layered acrylic, and small-batch zinc alloy production. Expect to pay more per unit at quantities of 1–10, but the option exists and the quality from reputable makers is excellent.
Typical MOQ tiers:
- 1–10 units: Laser-cut, acrylic, or small-batch zinc alloy; highest per-unit cost
- 25–100 units: Small production runs; mid-range cost; more finish options
- 300+ units: Full injection moulding or chrome electroplating available; OEM-quality output; best per-unit cost
Typical Lead Times
Custom production takes time. Be realistic:
| Order Type | Typical Lead Time |
|---|---|
| Laser-cut / no-MOQ specialist | 2–3 weeks |
| Small batch (25–100 units) | 3–5 weeks |
| Full production run (300+) | 5–8 weeks |
| Rush orders (if available) | Add 30–50% cost premium |
Always confirm lead time before ordering if you have a show, event, or launch date.
Price Ranges: Budget vs. Premium
You get what you pay for in the emblem market — but that doesn’t mean spending the most automatically gets you the best result.
| Tier | Price Range (per unit) | What You Get |
|---|---|---|
| Budget | $7–$15 | ABS plastic, vacuum metallisation, marketplace seller |
| Mid-range | $15–$40 | Better ABS or acrylic, vehicle-specific options, better adhesive |
| Premium | $40–$100+ | Zinc alloy, electroplated chrome, OEM-level finish, design support |
| Bulk (300+) | $10–$30/unit | Full production quality at scale; tooling cost amortised |
For a single enthusiast emblem, the $40–80 range from a reputable US or European manufacturer typically hits the sweet spot between quality and value.
How to Verify Quality Before Committing to Bulk
If you’re ordering 50+ units, always request a production sample before approving the full run. Verify:
- Surface finish: No pitting, cloudiness, or uneven plating
- Dimensions: Check against your spec sheet; measure with calipers if precision matters
- Adhesive quality: Ask for the adhesive spec (brand, grade, thickness). Look for 3M automotive foam tape specifically
- Material spec sheet: Reputable manufacturers can confirm material type in writing
- UV resistance certification: For ABS and acrylic, ASTM G154 compliance is the standard to request
Branding at scale comes with its own set of challenges — finish consistency, bulk pricing, and placement standards all need to align across every vehicle. If you’re ordering for a business, our guide on custom emblems for car dealerships and fleet vehicles covers everything from artwork specs to managing large orders without the headaches.
Frequently Asked Questions
Do custom car emblems void my vehicle's warranty?
How long do custom car emblems last?
Can I remove a car emblem without damaging the paint?
Rushing any of these steps is where paint damage occurs. Take your time; the process is entirely safe when done correctly.Are chrome car emblems actually metal?
Summary: Everything You Need to Make the Right Choice
Custom car emblems have moved well beyond novelty. The manufacturing processes, material options, and accessible ordering systems available today mean that a single enthusiast can get a production-quality, personalised automotive badge made to their exact design — at a price point that makes sense.
Here’s the essential takeaway from this guide:
Choose your material based on your climate and budget. Zinc alloy and stainless steel last the longest. ABS works well in mild climates if properly UV-stabilised.
Prepare your artwork before you approach a manufacturer. A vector file (AI, EPS, or SVG) will save you time, money, and frustration. If you don’t have one, pay for the manufacturer’s design service — it’s worth it.
Understand the process behind the finish. Electroplated chrome on zinc alloy is OEM-quality. Vacuum-metallised ABS is a budget option with a shorter lifespan. Know which one you’re getting.
Don’t rush the installation. A perfectly made emblem applied to a dirty or cold surface will fail within weeks. Surface preparation is 80% of a successful installation.
Request a sample before committing to bulk. For orders over 25 units, this is non-negotiable.
The right custom emblem is the kind of detail that stops people in a car park. It’s the thing that says your build is intentional, considered, and complete. It’s worth doing properly — and now you know exactly how.