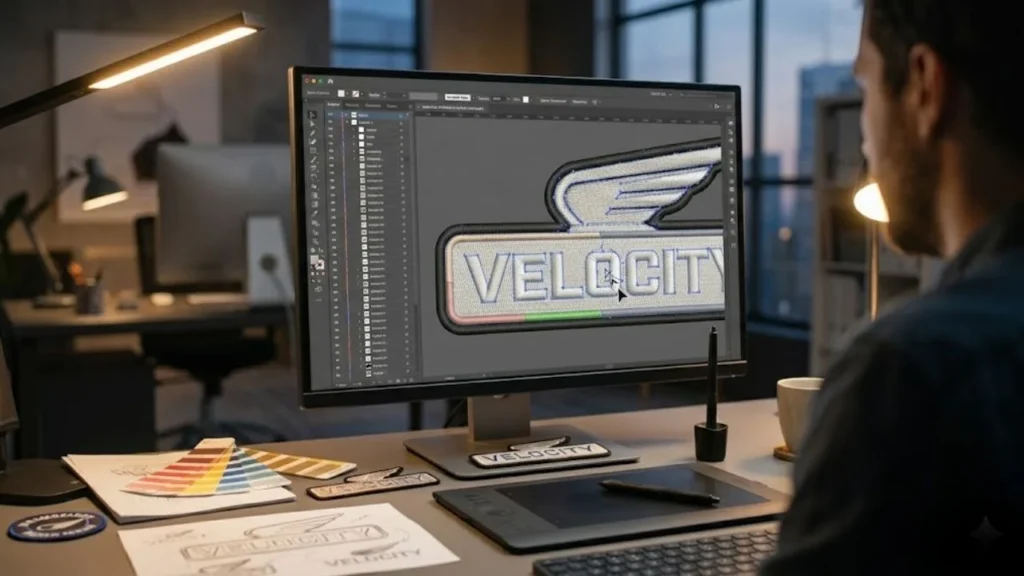
To create a vector logo for a custom emblem order, you need a file in AI, EPS, or SVG format built from scalable paths — not pixels — so it stays crisp at any size and translates cleanly into stitching, printing, or engraving.
In my experience reviewing artwork submissions for custom orders, the single most common problem is customers sending a low-resolution PNG and assuming it’ll work. It won’t — and it costs time, revisions, and sometimes money. This guide covers everything you need to know: what a vector logo actually is, which file format to use, how to build one from scratch, how to convert an existing logo, and what to include when you finally hit “submit.”
Whether you’re ordering a custom embroidered patch, a woven badge for uniforms, or a branded iron-on emblem, this is the artwork prep guide your vendor wishes they could send you first.
What Is a Vector Logo — and Why Does It Matter for Custom Emblems?
A vector logo is built from mathematical paths, anchor points, and nodes — not colored pixels. Instead of storing a grid of dots like a JPG or PNG, a vector file describes your design as a series of geometric instructions. Scale it to a business card or a stadium banner, and it stays perfectly sharp.
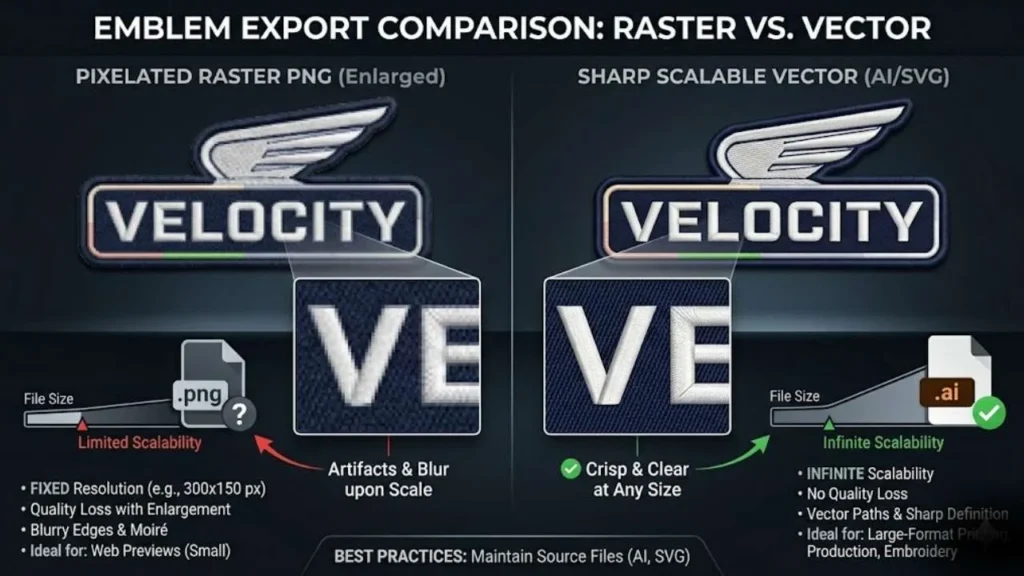
A raster image, by contrast, is made up of pixels arranged in a fixed grid. At the resolution it was designed for, it looks fine. But enlarge it for production — say, scaling a hat logo up to a jacket back — and you get blur, pixelation, and jagged edges that no amount of sharpening can fix.
Vector images also occupy very little disk space and allow easy editing of individual elements, which matters when your vendor needs to adjust a color, resize a section, or adapt your design for a new product.
Vector vs. Raster — A Quick Visual Comparison
| Feature | Vector (SVG, EPS, AI) | Raster (PNG, JPG) |
|---|---|---|
| Scalability | Infinite, lossless | Fixed; degrades when enlarged |
| Editability | Fully editable paths | Pixel-level only |
| File Size | Typically small | Larger at high resolution |
| Vendor Compatibility | Industry standard for production | Requires conversion for most orders |
| Color Accuracy | Supports Pantone/CMYK | Often RGB, limited color control |
Raster files look fine on screen, but they’ll appear dull and degraded rather than crisp and professional when upscaled for physical production. Your embroidery vendor, patch manufacturer, or digitizer will almost always ask you to resubmit if you send a raster file.
Why Emblem Orders Specifically Demand Vector Files
Patches, emblems, and embroidered products require a process called embroidery digitizing — converting your artwork into machine-readable stitch paths (DST, PES, or similar formats). That conversion needs clean, defined shapes to work from.
Vector formats like AI and EPS give digitizers clean artwork for optimal conversion. Low-resolution JPEGs can introduce artifacts — blurry edges, color merging, undefined boundaries — that make accurate digitization difficult or impossible. The cleaner your source file, the more faithfully your design gets reproduced in thread.
Getting your file format right is critical, but it’s just one step in the custom emblem process. Our complete guide to custom car emblems covers every stage from concept to finished badge so nothing catches you off guard.
Vector File Formats Explained — Which One Should You Use?
Not all vector formats are equal, and vendors have preferences. Here’s what each one means in practice.
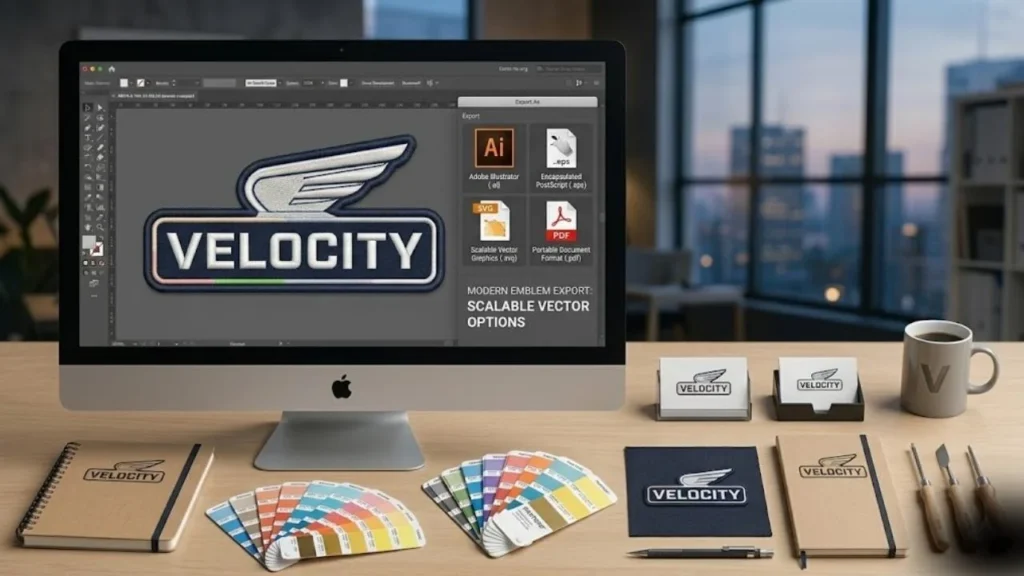
AI (Adobe Illustrator)
The native format of Adobe Illustrator, AI files are the most widely requested format by print vendors and embroidery digitizers. They allow easy editing and full customization within Illustrator.
Important: Save your AI file in a legacy version (CS6 is the safest bet) for maximum compatibility. Current-version Illustrator files may not open correctly in older software.
EPS (Encapsulated PostScript)
EPS has long been the industry standard for vector graphics, compatible with virtually every design application — Adobe Illustrator, CorelDRAW, Affinity Designer, and more.
One limitation to know: EPS doesn’t support transparent fills. If your emblem design uses transparency or overlapping semi-transparent layers, those effects will be lost or rendered incorrectly. Stick to flat, opaque fills and you’ll be fine.
SVG (Scalable Vector Graphics)
SVG is now the W3C vector graphic standard, supported by every modern browser and compatible with Inkscape, Figma, Canva, and most vector editors. It’s increasingly accepted by vendors and is the best format for anyone working without Adobe software.
One critical caveat with Canva: SVG exports from Canva often embed raster data inside the vector container, making them non-editable as true vector paths. Always open a Canva-exported SVG in Inkscape or send it to your vendor to verify before placing an order.
PDF (Vector-Based)
A properly saved PDF — especially one from Adobe Illustrator with editing capability preserved — is a fully editable vector format. Unlike AI files, PDF isn’t proprietary, so it works across any vector graphics software.
It’s an especially useful format when you’re sharing files with vendors who may not run Illustrator, or when you want a single file that’s both printable and editable.
Once your vector file is ready and your order is placed, you’ll want the surface prepped and waiting. Check out our guide on how to remove your existing car emblem without damaging paint so installation day goes smoothly.
How to Create a Vector Logo from Scratch — Step by Step
When I create emblem logos for production, I always start with these foundational steps. Skip one, and you’ll likely catch it at the revision stage — which is the most frustrating place to catch it.
Step 1 — Choose the Right Software
Your tool determines your capability. Here are the main options:
- Adobe Illustrator — The industry gold standard. The pen tool, shape builder, and Image Trace features are purpose-built for this kind of work. If you can access it, use it.
- Inkscape — A free, open-source vector editor with a surprisingly powerful feature set. It’s a great option for those on a tight budget, and it exports natively to SVG and EPS.
- Affinity Designer — A paid but affordable Illustrator alternative that exports AI, EPS, and SVG files. Excellent for serious designers who don’t want an Adobe subscription.
- Canva — Usable for basic SVG export, but its vector files need verification before submission. Not recommended for complex emblem work.
Step 2 — Set Up Your Document Correctly
Before drawing a single path:
- Set your color mode to CMYK — not RGB. Embroidery and print production use CMYK, and colors shift significantly between the two modes.
- Set your artboard to the intended physical size of the finished emblem (e.g., 3″ × 3″ for a standard patch).
- Load Pantone (PMS) swatches into your color panel. This is how thread color matching works — vendors match your design colors to available thread colors using Pantone codes.
Step 3 — Build Your Emblem Structure
A well-designed emblem typically has four elements: an outer border or shape, a central icon, a text ring or banner, and a background fill. Each of these should be a separate, closed path — not loosely grouped, not overlapping without intention.
Keep your color count to 6–8 flat fills maximum for embroidery work. Excessive color changes increase production time and complexity, and some manufacturers charge per color. Flat, solid fills also stitch far more cleanly than gradients or color blends.
Step 4 — Optimize Typography for Production
Typography is where most emblem designs break down at the production stage.
- Text smaller than 6pt often doesn’t translate well to embroidery — the stitches simply can’t render that level of detail cleanly. Use bold, clean, legible fonts.
- Always convert all text to outlines (or paths) before saving your final file. If your vendor’s machine doesn’t have your font installed, live text will substitute a different typeface entirely.
- Avoid thin serifs, hairline scripts, or condensed decorative fonts at small sizes. Thick, well-spaced letterforms read best in thread.
Step 5 — Check and Clean Your Paths
Before exporting, do a thorough file cleanup:
- Remove hidden anchor points, stray objects, and duplicate paths — these create invisible artifacts in production files.
- Expand all strokes so line weights are embedded in the path shape, not applied as an appearance attribute that could be lost or misread.
- Ensure colors have clear separation between adjacent design elements to prevent thread blending during embroidery.
Step 6 — Save and Export Correctly
Save your native file (AI or SVG) for your own records and future edits. Then export a vendor-ready EPS or PDF to submit with your order.
Include all Pantone or thread color codes — either embedded in the file as swatch names or listed clearly in a separate spec sheet. And double-check that all fonts are outlined before you export.
How to Convert an Existing Logo to Vector (Raster-to-Vector)
Already have a logo — just not in vector format? This is one of the most common situations when placing a custom emblem order. Here’s how to handle it.
Using Adobe Illustrator’s Image Trace
- Place your raster image (PNG or JPG) into an Illustrator document
- Select it, then open Window → Image Trace
- Choose a preset — “16 Colors” works well for most logos; “High Fidelity Photo” for complex images
- Click Expand to convert the trace result into editable paths
- Ungroup and clean up stray paths manually
Auto-trace works best on simple, high-contrast logos with flat colors. Photographic or gradient-heavy designs usually need manual redrawing to produce clean paths.
Using Inkscape’s Trace Bitmap Tool
For a free alternative:
- Import your raster image into Inkscape
- Go to Path → Trace Bitmap
- Adjust brightness cutoff or color thresholds
- Click OK, then Object to Path to finalize
One important distinction: most online tools that claim to convert PNG to SVG don’t actually vectorize the image — they simply save the raster data inside a vector file container. True vectorization requires path generation, not just a format change. Always open the output in a vector editor and zoom in to confirm you have real paths, not an embedded bitmap.
When to Hire a Professional Instead
Some logos simply shouldn’t be auto-traced. If your design includes:
- Photographic elements or complex gradients
- Fine detail that must be reproduced accurately
- Multiple overlapping shapes that need clean path separation
…it’s worth paying for professional vectorization. Services like Digitizing Ninjas offer vector conversion alongside digitizing. Many patch vendors — including Stadri Emblems, Dutch Label Shop, and Custom Woven Labels — offer free or low-cost artwork conversion as part of the order process. Freelance options on Fiverr or 99designs typically run $15–$75 depending on complexity.
Emblem-Specific Design Rules You Can’t Ignore
This is where most online guides fall short. Creating a technically correct vector file is one thing. Designing an emblem that actually works in production is another.
Color Limits for Different Emblem Types
| Emblem Type | Max Colors | Notes |
|---|---|---|
| Embroidered patch | Up to 12 thread colors | Most orders work best at 6–8 |
| Woven patch | 8–10 | Better for fine detail than embroidery |
| PVC/rubber patch | Fewer restrictions | Still works best with flat fills |
| Chenille patch | 3–4 | Very limited color range |
Always supply Pantone color codes alongside your design. Vendors can match Pantone colors to their thread inventory for brand-accurate results — guessing from a screen-captured color is a recipe for an off-brand product.
Minimum Size and Line Weight Requirements
Production imposes hard physical limits on what can be rendered:
- Logos should generally be at least 2″ × 2″ (50mm × 50mm) for optimal embroidery detail
- Increase stroke/line weights to at least 0.5mm–1mm before submitting for embroidery
- Keep text at a minimum of 0.2 inches tall for readable stitched lettering
Going below these minimums doesn’t mean your order gets rejected — it means fine details get dropped, strokes get merged, and text becomes illegible once stitched.
Simplifying Your Emblem Design Without Losing Impact
Embroidery isn’t a printer. It can’t reproduce gradients, drop shadows, glows, or photographic detail. Before submitting, review your design and:
- Replace all gradients with the closest flat Pantone fill
- Remove fine interior details smaller than 2mm — they’ll be lost in thread
- Increase contrast between adjacent color areas
- Choose bold, high-contrast color combinations — they read far better on fabric than subtle, nuanced palettes
A simplified design isn’t a compromised design. The best emblem logos are built for production from the start.
Your logo will look different depending on the finish it’s printed or cast on, so it’s worth thinking about both together. Our chrome vs. black emblem breakdown helps you visualise how your artwork will actually read in each finish before you finalise anything.
What to Include When You Submit Your Vector Logo for a Custom Order
Getting your artwork submission right the first time eliminates back-and-forth with your vendor and gets your order into production faster. Here’s the complete checklist:
- ✅ Vector file in AI, EPS, SVG, or PDF format
- ✅ All text converted to outlines/paths
- ✅ Pantone or thread color codes listed per design element
- ✅ Physical size specifications (width × height in inches or mm)
- ✅ Desired emblem shape (circle, oval, rectangle, or custom die-cut)
- ✅ Backing preference (sew-on, iron-on, hook & loop/Velcro)
- ✅ Reference image — even a photo of an existing patch helps your vendor understand the intent
- ✅ Brand guidelines PDF if available
The more information you provide upfront, the fewer rounds of revision you’ll need.
What Vendors Do With Your File
When you submit an AI, EPS, or PDF file to a vendor like Underground Printing or Sienna Pacific, their team converts it into embroidery-specific formats — typically DST or PES files — that control the stitching machine’s needle path, thread color changes, and stitch density.
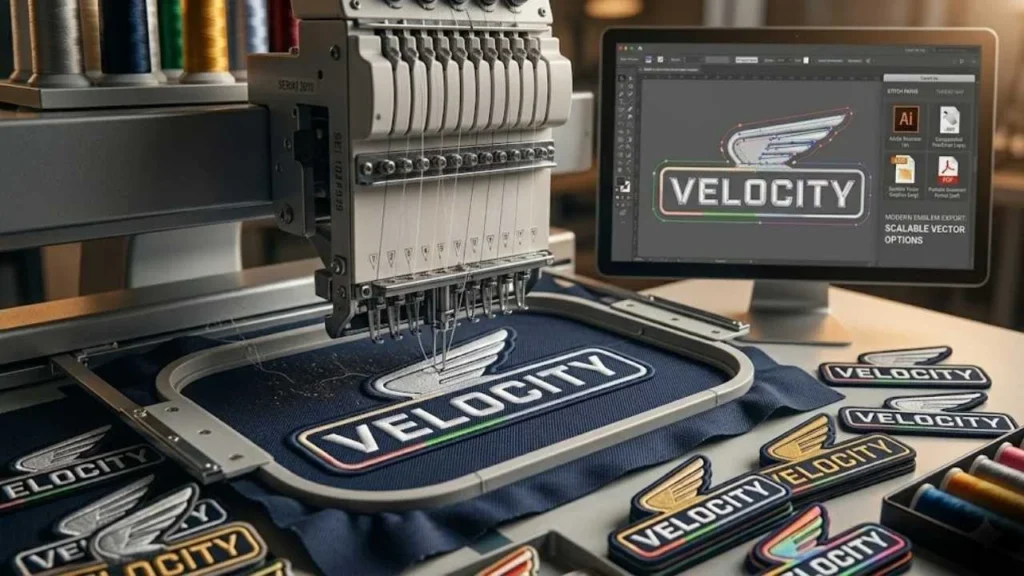
This process is called embroidery digitizing, and a clean vector file is what makes it accurate. Most reputable vendors provide a free digital proof before going to full production. Always review and approve this proof carefully — it’s your last chance to catch errors before thread hits fabric.
If you’re supplying vector files for a fleet order, consistency across every badge matters as much as quality. Our guide on custom emblems for dealerships and fleet vehicles covers the file requirements and brand standards you’ll need to meet for bulk production.
Common Mistakes That Get Your Artwork Rejected (or Ruin Your Order)
Avoid these — they’re the most common reasons orders get delayed or returned:
- Submitting a PNG or JPG and assuming it’s a vector — even a high-resolution raster file is not a vector file
- Leaving text as live/editable — if your font isn’t installed on the vendor’s system, it gets substituted
- Using gradients, drop shadows, or transparency effects — these don’t translate to embroidery or most patch production
- Designing in RGB color mode — colors will shift when converted to CMYK for production
- Sending a file that’s too small — a 200px logo gives digitizers nothing to work with
- Using too many colors — every additional thread color adds cost and complexity
- Overlapping paths without clean separation — causes thread bunching and stitch errors
Frequently Asked Questions
Can I use Canva to create a vector logo for an emblem order?
What's the best free software to create a vector emblem logo?
Do I need to hire a designer, or can I do it myself?
What file format does a custom embroidery or patch company need?
How many colors can my custom emblem have?
Can I convert my PNG logo to a vector file online?
Conclusion
Knowing how to create a vector logo for your custom emblem order is the difference between a smooth production process and a frustrating cycle of rejections and revisions. Start with the right software — Illustrator, Inkscape, or Affinity Designer. Build your emblem with clean, closed paths, flat CMYK colors, and outlined text. Follow the production constraints for your emblem type: color limits, minimum sizes, and line weights. And submit a complete package — your vector file plus Pantone codes, size specs, and backing preferences.
Now that you understand the full process, you’re ready to submit artwork your vendor can use immediately — without back-and-forth revisions or costly file corrections. Whether you’re working with Stadri Emblems, Dutch Label Shop, Underground Printing, or any other custom patch supplier, a production-ready vector logo is the single most important thing you can bring to the table.
Get your file right once. Get your emblem made right the first time.
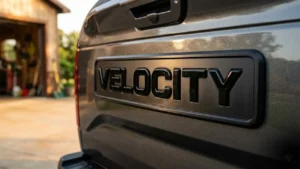
Logos going on tailgate badges need to be especially clean given the larger surface area and viewing distance. Head over to our custom truck emblems guide to see how vector artwork scales up on full-size truck badges.