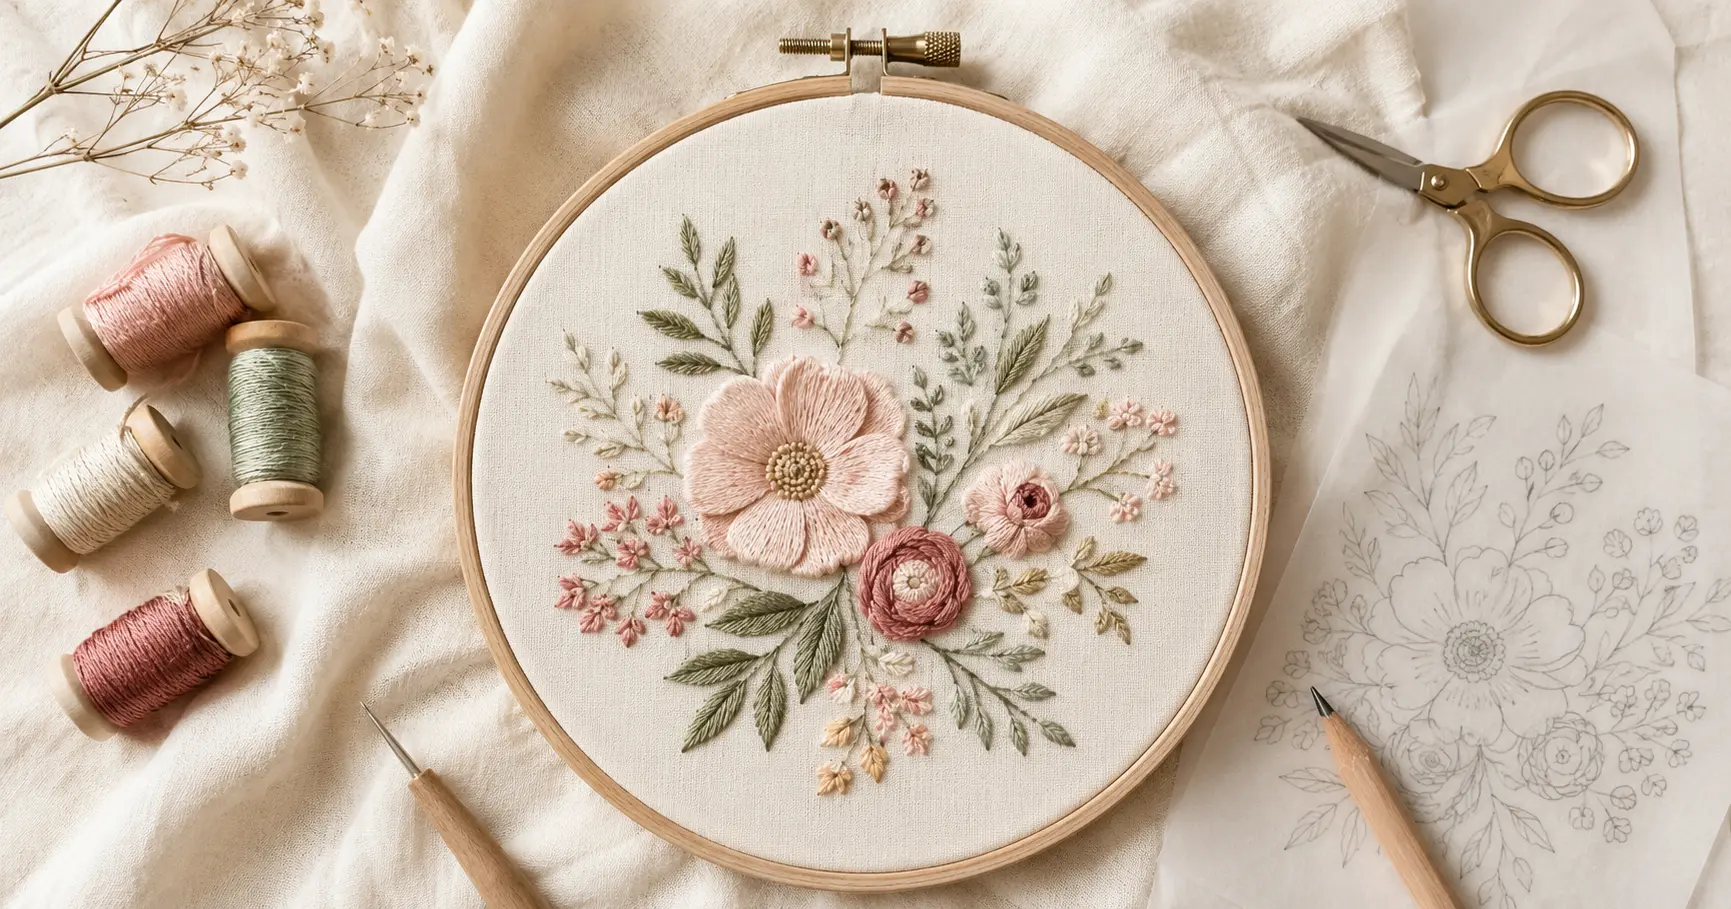
You can design embroidery patterns for free using nothing more than a phone, a free app like Canva, or even a sheet of tracing paper. Whether you’re a complete beginner or a seasoned stitcher ready to go original, this guide walks you through every method — from hand-drawing to AI-generated line art — so you can start stitching your own designs today.
No art degree. No expensive software. Just your creativity and the right know-how.
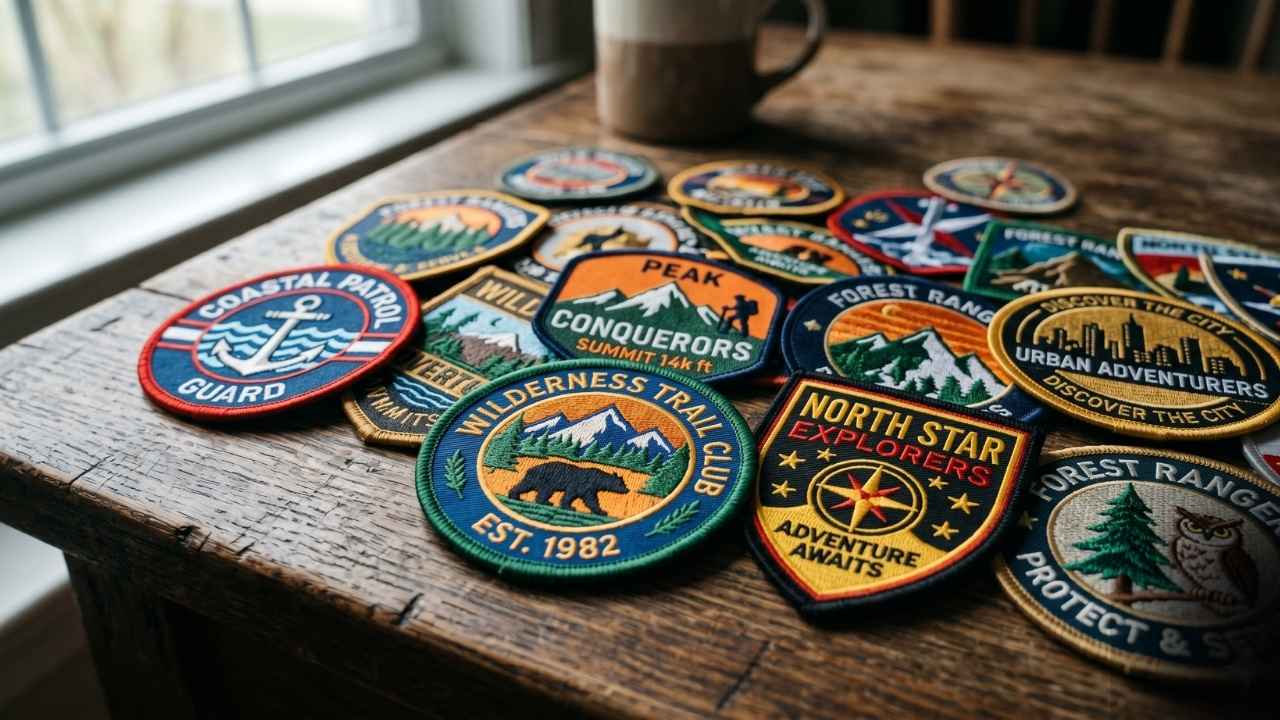
No matter what type of patch you’re making, whether it’s a logo, something more fashion centered or another form of custom art– all successful patch projects start with solid design. Make custom patches for clothing & know the full production process.
How to Design Embroidery Patterns for Free: What You Need Before You Start
Before you open a single tool, it helps to set yourself up for success. A few basics will make the whole process smoother and save you from frustration later.
Here’s what to have on hand:
- Embroidery hoop (size depends on your design)
- Fabric — cotton or linen works best for beginners
- Transfer tools — a water-soluble pen, tracing paper, or a lightbox
- Thread — DMC or Anchor are the most widely used brands
The software learning curve is real, but it’s not steep. Many of the free tools covered here are designed for beginners, and several require zero design experience whatsoever.
Hand Embroidery vs Machine Embroidery: Why the Process Differs
This is the first thing to get clear on — because the workflow is completely different depending on which type you’re doing.
Hand embroidery needs a printable line drawing you can transfer onto fabric. The design just needs to be a clean outline — no stitch paths or file formats required.
Machine embroidery requires digitizing: converting your design into a stitch file (like .PES or .DST) that your embroidery machine can actually read and execute. This is a more technical process and requires different software.
Most free tools cater to hand embroidery. If you’re working with a machine, skip ahead to the Inkscape + Ink/Stitch section — that’s your best free option.
How to Think About Your Design Before Opening Any Tool
Embroidery has limitations that painting and printing don’t. Keeping these in mind before you start will save you a lot of reworking.
Simplify. Fine details get lost in thread. A design that looks beautiful on screen can become a muddy mess when stitched. Think bold outlines, clear shapes, and defined areas of colour.
Outline vs fill. Decide upfront whether your design will be outline-only (like a simple floral sketch) or filled in with satin stitch or long-and-short stitch. Fill designs require more planning and more thread.
Scale matters. A tiny 2-inch design needs far fewer details than a 10-inch hoop piece. Always plan your design at the actual size you’ll stitch it.
Once your design is ready, you’ll need a reliable embroidery machine to bring it to life. Explore beginner-friendly recommendations in Best Embroidery Machines for Beginners (2026).
Method 1 — Design Embroidery Patterns for Free by Hand (No Computer Needed)
If the idea of learning new software makes you want to put the whole project down, this section is for you. You genuinely do not need a computer to design your own embroidery patterns.
In my experience, hand-drawn designs often have more character and warmth than digitally produced ones. They’re also quicker to get onto fabric — no printing required.
Using Tracing Paper and the Lightbox Method
This is the most beginner-friendly method, and it works brilliantly.
What you need: Tracing paper, a pencil, a lightbox (or a sunny window/laptop screen), and a water-soluble pen.
Step-by-step:
- Find a reference image — a simple floral illustration, an animal outline, a botanical print
- Place your tracing paper over the image
- Trace the outline lightly in pencil, keeping lines clean and simple
- Refine your tracing with a fine-tipped artist’s pen
- Transfer the design to fabric using a lightbox: place fabric over your drawing, trace with a water-soluble pen, then stitch
Where to find free traceable designs: The Antique Pattern Library (antique-pattern-library.org) is an outstanding free resource. It holds thousands of vintage embroidery designs in the public domain — animals, florals, borders, samplers — all free to use.
Adult colouring books are another overlooked gold mine. Artists like Johanna Basford produce intricate line drawings that translate beautifully into embroidery patterns.
How to Turn a Photo Into a Hand-Drawn Embroidery Pattern
You don’t need to be an artist to work from a photo. This method is perfect for pet portraits, botanical subjects, or anything with a clear subject.
Step-by-step:
- Print your photo in black and white at the size you want to stitch
- Lay tracing paper over it and trace only the most essential outlines — don’t trace every shadow or detail
- Simplify as you go: reduce a fluffy dog into clean shapes, drop tiny background details
- Mark any important colour changes with a light pencil note
- Transfer to fabric using the lightbox method above
The key is ruthless simplification. What looks like “not enough detail” on paper usually looks perfectly beautiful when stitched.
Method 2 — Using Free Online Tools to Design Embroidery Patterns
This is where most people want to start — and there are some genuinely excellent free options. Here’s a comparison table to help you pick the right one, followed by full walkthroughs of each.
| Tool | Best For | Skill Level | Hand/Machine | Cost | Output |
|---|---|---|---|---|---|
| Canva | No-draw beginners | Beginner | Hand | Free | PDF/PNG |
| Inkscape + Ink/Stitch | Machine digitizing | Intermediate+ | Machine | Free | PES/DST/SVG |
| Pixel Stitch | Cross-stitch from photos | Beginner | Hand | Free | PDF grid |
| Stitch Fiddle | Cross-stitch from scratch | Beginner | Hand | Free (basic) | PDF/PNG |
| Procreate | Tablet drawing | Intermediate | Hand | Paid (one-off) | PNG/PDF |
| Canva AI / Adobe Firefly | AI line art | Beginner | Hand | Free (limited) | PNG/PDF |
Canva (Free Plan) — Best for Beginners Who Can’t Draw
Canva is the most popular recommendation for a reason: it’s free, browser-based, requires zero design experience, and takes about 15 minutes to produce a usable pattern.
Step-by-step walkthrough:
- Go to canva.com and create a free account
- Click “Create a design” → “Custom size”
- Set your dimensions to 1 inch larger than your hoop (e.g., 8×8 inches for a 7-inch hoop)
- Browse “Elements” in the left sidebar — search for florals, animals, botanicals, or lettering
- Add your chosen elements, resize and arrange them within a circle guide (add a circle the size of your hoop to keep your design centred)
- Delete the guide circle, set opacity to about 30% to reduce ink bleed on transfer paper
- Export as PDF Print for accurate scaling
Commercial use note: Canva’s free graphics can be used commercially, but always check the licence on individual elements. Canva Pro elements require a Pro subscription for commercial use. If you plan to sell your patterns on Etsy, screenshot the licence terms before downloading — just in case.
Inkscape + Ink/Stitch — Best Free Tool for Machine Embroidery Digitizing
Inkscape is a free, open-source vector graphics editor. Ink/Stitch is a free extension built on top of it that converts vector artwork into machine-readable embroidery files.
Together, they form the most powerful completely free solution for machine embroidery digitizing. The learning curve is steeper than Canva, but there’s a detailed user manual and an active community to help.
What you can do:
- Convert vector line drawings into stitch paths
- Choose stitch types: running stitch, satin stitch, fill stitch, tartan patterns
- Add pre-digitized text using the built-in lettering tool
- Export to .PES, .DST, .SVG, and many other formats
Who it’s for: Anyone with an embroidery machine who wants to digitize their own designs without paying for professional software (which can cost hundreds per year).
Stitch Fiddle and Pixel Stitch — Best for Cross-Stitch Patterns
If cross-stitch is your thing, these two tools make it genuinely effortless to design your own custom embroidery patterns.
Pixel Stitch converts any uploaded image into a cross-stitch grid pattern. You choose the stitch count, fabric size, and number of colours — and it automatically matches your palette to DMC, Anchor, or Sulky thread numbers. The result is a printable PDF pattern, ready to stitch.
Stitch Fiddle lets you either upload an image or build a design pixel-by-pixel from scratch. The free plan is solid for most hobbyists. It also includes colour matching to DMC thread codes, which makes buying the right thread effortless.
Both tools are browser-based — no download needed.
Procreate (iPad) and Adobe Fresco — Best for Digital Drawing on a Tablet
This is a gap that almost no other guide covers. If you have an iPad (or even an Android tablet), you can design sophisticated embroidery patterns entirely on your device — no desktop required.
Procreate (one-off purchase, currently around $12.99) is the gold standard for tablet illustration. For embroidery design specifically, the symmetry tool is a game-changer: it mirrors your strokes in real time, making it effortless to create perfectly balanced floral mandalas and geometric patterns.
Adobe Fresco has a free tier and works on both iPad and desktop. It’s excellent for loose, organic botanical designs.
Workflow:
- Design in Procreate or Fresco using a simple brush on a white background
- Export as a high-resolution PNG
- Print and transfer using the lightbox method, or print onto water-soluble stabilizer
Which patch backing is best depends on the cut, style and purpose of your embroidery design. Iron-On vs. Sew-On Patches: What is more durable and easier to use?.
Method 3 — Use AI to Generate Free Embroidery Pattern Ideas
This is the biggest gap in every competitor article published to date — and it’s a genuinely exciting development for embroiderers who feel held back by their drawing ability.
AI image generators can produce clean, stitch-ready line art in seconds. The trick is knowing exactly how to prompt them.
What Prompts Work Best for AI-Generated Embroidery Line Art
Not all AI-generated images work as embroidery patterns. You need simple, clean line art — not painterly illustrations or photorealistic renders.
Prompts that consistently work well:
- “Simple line art illustration of a peony, black outlines on white background, no shading, no fill, suitable for embroidery transfer”
- “Minimalist botanical line drawing, single flower, clean vector-style lines, printable”
- “Folk art embroidery design, traditional floral motif, flat black outlines, white background”
Free tools to try:
- Canva AI (Magic Media) — available on the free plan with limited credits
- Adobe Firefly — free tier available at firefly.adobe.com
- Microsoft Designer / Bing Image Creator — free and surprisingly capable for line art
In my testing, prompting for “embroidery transfer design” specifically produces cleaner results than generic “line art” — the AI seems to understand the format requirement.
How to Clean Up AI Art for Use as an Embroidery Pattern
AI-generated images sometimes have messy lines, unwanted textures, or grey tones that won’t transfer well. Here’s how to clean them up for free.
Step 1: Run your image through Vectorizer.ai (free tier available) or Inkscape’s Trace Bitmap function to convert it into a clean vector outline.
Step 2: Open the result in Inkscape and simplify the paths — delete any stray nodes and smooth out jagged lines.
Step 3: Print the cleaned vector at 100% scale and transfer as normal.
This takes about 10 minutes once you’ve done it a couple of times, and the results are genuinely impressive.
How to Plan Thread Colors for Your Design (For Free)
Thread color planning is completely overlooked by every competitor article — and yet it’s one of the most common questions embroiderers have before they start a new project.
Choosing the wrong thread colours (or realising your planned palette doesn’t exist in DMC) after you’ve already transferred your pattern is frustrating. Do the colour work upfront.
Using the Free DMC Color Planner App
DMC — the world’s most widely used embroidery thread brand — offers a free Color Planner app (iOS and Android). You can:
- Browse all DMC thread colours by name, number, and visual swatch
- Build and save custom palettes for your project
- Use the camera to match thread colours to real-world objects or photos
This app is invaluable for checking whether the colours you’ve chosen in your digital mockup actually exist as purchasable DMC threads before you commit to a design.
Creating a Color Mockup to Preview Your Embroidery Before Stitching
Before a single stitch goes in, build a digital colour mockup of your design. It takes 10 minutes and can save hours of unpicking.
In Canva: Fill each element of your design with the colour of the thread you plan to use. Then change the background colour of your canvas to match your fabric. A design that looks great on white might completely disappear on dark linen.
In Procreate: Use the colour fill tool to try multiple colourways rapidly. The colour dropper tool lets you sample exact shades from a DMC colour chart image.
Experiment with your fabric colour as a variable. The same thread palette can look completely different on cream Aida, natural linen, or black cotton twill.
How to Print and Transfer Your Free Embroidery Pattern Correctly
Designing the pattern is only half the job. Getting it accurately onto your fabric is where many beginners stumble — and where most guides go quiet.
This section covers the full print-to-fabric process, including the settings that most tutorials skip entirely.
Setting the Right Print Size: DPI, Scale, and Margins
Scaling errors are the most common printing mistake. A pattern designed at 7 inches that prints at 5 inches because of margin auto-scaling is a genuinely common problem.
Export settings:
- Export at 300 DPI for crisp, clean lines
- Save as PDF (not JPEG — JPEG compression blurs fine lines)
- When printing, set scaling to “Actual Size” or “100%” — never “Fit to page”
Hoop sizing guide:
- 4-inch hoop → design area approximately 3 inches
- 7-inch hoop → design area approximately 6 inches
- 10-inch hoop → design area approximately 9 inches
A4 vs US Letter: If you’re in the UK/Europe and your design is sized for US Letter, it may be clipped when printing on A4. Set your Canva canvas to A4 (297 × 210mm) or US Letter (11 × 8.5 inches) based on what’s in your printer.
Custom embroidery designs are perfect for upgrading denim jackets with a personal touch. Get creative inspiration from How to Customize a Denim Jacket: 11 Ideas.
4 Transfer Methods: Which One to Use for Your Fabric Type
| Method | Best For | Cost | Difficulty |
|---|---|---|---|
| Lightbox tracing | Light, thin fabrics | Free (or cheap lightbox) | Easy |
| Water-soluble stabilizer (e.g. Sulky Sticky Fabri-Solvy) | Any fabric; clean results | Low | Easy |
| Carbon transfer paper | Most fabrics; darker lines | Very low | Easy |
| Iron-on transfer pen | Repeated use of one design | Low | Moderate |
The water-soluble stabilizer method is the most beginner-friendly for printed designs. Print your pattern onto Sulky Sticky Fabri-Solvy (or similar), stick it directly to your fabric in the hoop, stitch through it, then rinse away in warm water. No tracing required.
The lightbox method is completely free if you use a laptop screen — just tape your fabric over the screen, trace with a water-soluble pen, and stitch. Works beautifully on thin cotton or linen.
Can You Sell Patterns You Design With Free Tools? Copyright Basics
This is the question almost no embroidery blog answers honestly — yet it matters enormously if you plan to sell your work on Etsy or at craft fairs.
The short answer: it depends entirely on which elements you used and where they came from.
Canva: Elements marked “free” on Canva can be used commercially. Elements requiring a Pro subscription cannot be used commercially without that subscription. Always check the individual element licence before selling anything that uses Canva graphics.
Pixabay: Images downloaded from Pixabay are generally free for commercial use, but some contributors apply restrictions. Screenshot the licence page at the time of download — it protects you if questions ever arise.
AI-generated art: This is a genuine legal grey area. Copyright law in most countries currently does not protect purely AI-generated images (since there’s no human authorship). However, if you substantially modified the AI output yourself, your modifications may be protectable. Laws are evolving rapidly — check your local copyright authority for the latest guidance.
Tracing from photos or existing artwork: Tracing a copyrighted photo or illustration does not make your version copyright-free. If you plan to sell, either use photos you took yourself, images in the public domain, or images with a commercial-use licence.
When in doubt, design from scratch or use verified public domain sources like the Antique Pattern Library.
Free Embroidery Pattern Resources and Inspiration Libraries
Sometimes the best way to learn to design embroidery patterns is to study great ones. Here are the best free libraries to browse and download from.
- Antique Pattern Library (antique-pattern-library.org) — thousands of public domain vintage patterns, fully free to use
- LoveCrafts — hundreds of free hand embroidery patterns from brands like DMC, available to download without a subscription
- Makenstitch — free hand embroidery patterns with step-by-step tutorials; particularly good for needle painting and florals
- DMC’s official website — free seasonal and themed patterns, all mapped to DMC thread numbers
- Pixabay SVG files — search for “floral SVG line art” to find vector files you can open directly in Inkscape and use as the basis for your own designs
- Reddit r/Embroidery — not a pattern library, but an active community where members share pattern recommendations, tools, and honest reviews
Print on Demand services also help you further monetize your to sell without the hassle of inventory management if you are looking for ways to make money from your embroidery designs. Check all the popular platforms in Best Print-on-Demand Platforms for Custom Merch.
Frequently Asked Questions
What is the best free software for embroidery design?
Can I design embroidery patterns if I can't draw?
How do I convert an image to an embroidery pattern for free?
What file format do embroidery machines use?
Is Canva good for making embroidery patterns?
How do I transfer an embroidery pattern onto fabric?
What is the difference between digitizing and designing an embroidery pattern?
Start Designing Your Own Embroidery Patterns for Free Today
Learning how to design embroidery patterns for free is more accessible than most stitchers realise. Whether you grab a sheet of tracing paper, open Canva on your phone, or experiment with AI-generated line art, the barrier to creating your own original designs has never been lower.
Here’s the simplest path by skill level:
- Complete beginner: Start with Canva’s free elements and the lightbox transfer method
- Photo to stitch: Use Pixel Stitch to convert any image into a cross-stitch grid
- Tablet user: Try Procreate or Adobe Fresco with the symmetry tool for stunning florals
- Machine embroiderer: Download Inkscape and install the Ink/Stitch extension
- AI-curious: Experiment with Adobe Firefly or Canva AI using the line art prompts in this guide
The most important step is simply starting. Pick one method, design something small, and get it onto fabric. You’ll learn more from stitching your first original pattern — however imperfect — than from reading ten more guides.
Now go make something.
Last updated: May 2026
Author note: This guide draws on hands-on testing of each tool listed, with experience across both hand and machine embroidery. Thread colour recommendations reference DMC’s official thread numbering system.