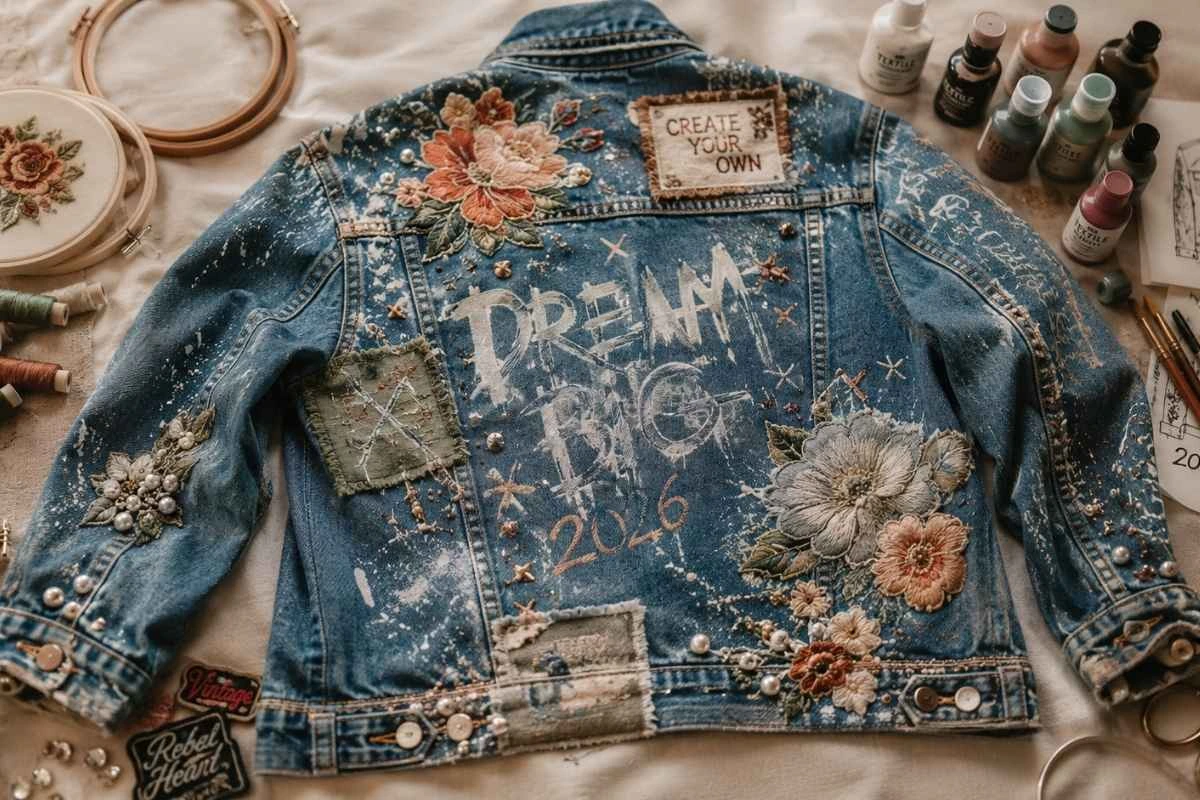
Your denim jacket is the most versatile canvas you own — and it’s been waiting for a makeover.
Fast fashion floods the market with identical pieces. Customizing yours breaks that cycle and creates something no one else has. It’s also one of the most meaningful ways to practice slow fashion: producing just one pair of jeans uses an estimated 1,800 gallons of water, so upcycling what you already own — or thrifting a base — is a genuine win for the planet.
Whether you want a full denim jacket makeover or a single subtle detail, this guide covers 11 proven techniques, each rated by difficulty and cost, so you know exactly what you’re getting into before you pick up a paintbrush.
Before You Start: How to Choose the Right Base Jacket for Customization
The best customization starts before the first stitch or brushstroke. Choosing the wrong jacket wastes time and materials. Here’s what to look for.
Wash, Weight, and Weave: What to Look For
Wash matters more than people think. A light-wash or raw indigo jacket shows hand-painted designs and bleach effects dramatically better than a dark wash. Mid-wash jackets are the most versatile — they accept paint, patches, embroidery, and bleaching without issue.
For weight, aim for 10–12 oz denim (standard mid-weight). Heavier denim holds studs and structural cuts without fraying excessively. Lighter denim is better for embroidery and hand stitching.
Tightly woven denim holds ink and paint cleaner. Avoid heavily pre-washed, “worn-in” fabric — the surface is too rough for fine detail work.
Thrift Store Finds vs. Buying New
Thrift stores are the #1 source for customization projects, and for good reason.
- Cost: $3–$15 vs. $40–$90+ new
- Availability: Levi’s, Wrangler, and Lee jackets from the ’80s and ’90s are everywhere at thrift shops — and the older cotton is actually easier to embroider and paint on
- Sustainability: Giving an old jacket new life is the whole spirit of the thrift flip denim movement
If you do buy new, look at Urban Outfitters’ BDG range or a plain Levi’s Trucker for a clean canvas.
Trucker vs. Oversized vs. Cropped Silhouettes
Each silhouette opens different creative doors:
- Trucker jacket (classic fitted) — ideal for back panel art, patches, and embroidery; the structured shape holds its form well
- Oversized jacket — 2025’s dominant trend; more surface area means more room for complex designs; suits the gender-neutral styling direction the industry is moving toward
- Cropped jacket — best for simple embellishments on the collar, chest, and cuffs; structural cuts like fringe and lattice work look sharp on a cropped hem
Using custom patches is amongst the most popular ways of personalizing denim jackets and street wear ensembles. To create your own, learn the whole process in homemade custom patches for clothing.
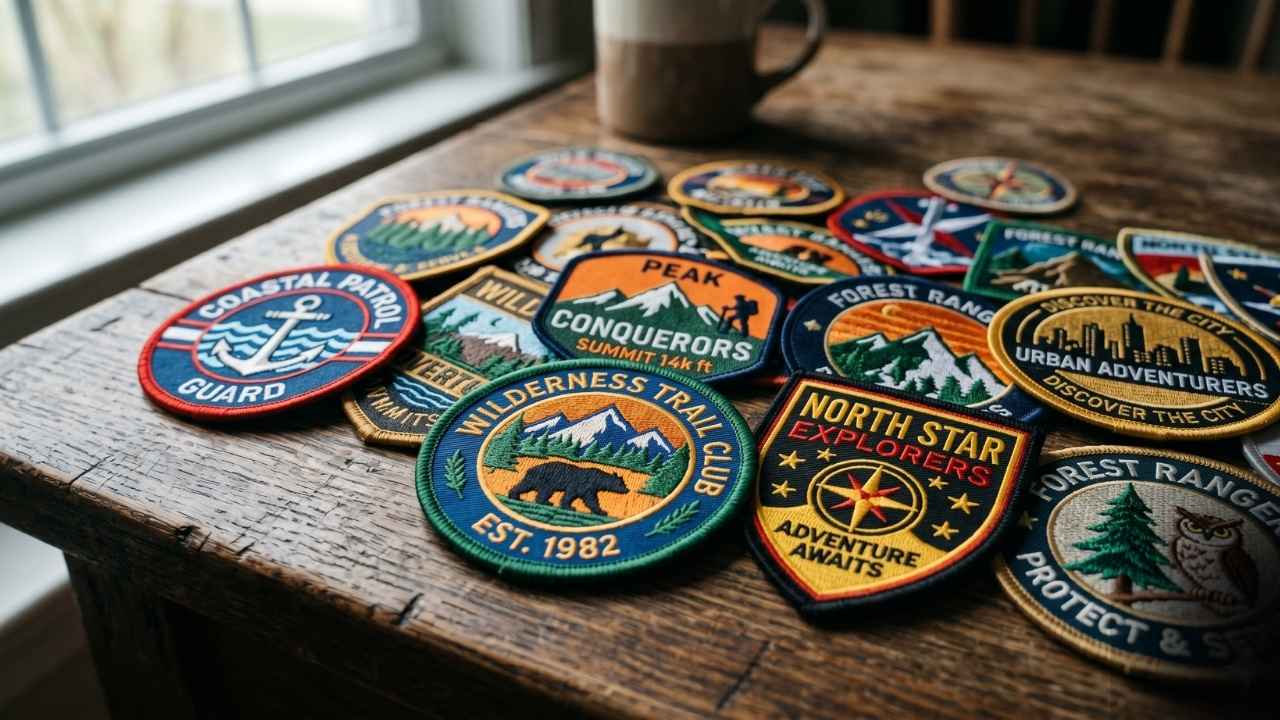
1. Patch It Up — Iron-On and Sew-On Patches
⭐ Difficulty: Easy | 💰 Estimated Cost: $5–$20 | 🎨 Style Match: Americana, band fan, maximalist
Patches are the most accessible way to customize a denim jacket, and they’ve never been more on-trend. The right patch collection turns a plain jacket into a wearable autobiography.
Iron-On vs. Sew-On: Which Lasts Longer?
Iron-on patches use a heat-activated adhesive — they’re fast and require zero sewing skills. But over time (especially through washing), the glue weakens and edges lift.
Sew-on patches last significantly longer, particularly in high-friction spots like elbows and pockets. For the best of both worlds: iron on first to position, then sew around the edges with a straight or blanket stitch.
Pro tip: Use a denim needle when machine-sewing through thick patches — it prevents skipped stitches.
Placement Ideas: Collar, Back Yoke, Sleeves
- Back yoke — the wide upper-back panel is prime real estate for one large statement patch or a curated cluster
- Chest pocket flap — a small, clean patch here looks intentional and polished
- Sleeves — stagger patches from shoulder to cuff for a tour-jacket effect
- Collar — small flag, letter, or emblem patches here frame the face beautifully
Where to Buy Patches
- Etsy — handmade, vintage, and niche patches; search for “vintage jacket patches” or “embroidered band patches”
- Thrift stores — check the sewing/notions section; vintage patches are often loose in bins for under $1
- Band merch stores — official patches from your favorite artists
- Michaels — decent starter selection; look for iron-on letters and themed patches
2. Hand Painting on Denim
⭐⭐ Difficulty: Moderate | 💰 Estimated Cost: $15–$40 | 🎨 Style Match: Wearable art, streetwear, maximalist
Hand-painted denim is having a serious moment. Instagram and Pinterest are full of jaw-dropping custom jean jacket women’s pieces — floral backs, typographic collars, portrait art. It’s the ultimate wearable art jacket.
Best Paints to Use: Fabric Acrylic vs. Textile Paint
Fabric acrylic paint (like Tulip Fabric Paint or Blick Art Materials’ student-grade acrylics) is the most widely available and beginner-friendly option. It dries flexible, adheres well to denim, and comes in hundreds of colors.
Professional textile paint (like Tarrago’s fabric paint range) is purpose-built for clothing — it bonds more deeply to fibers, stays more pliable, and handles washing better. Worth the upgrade for pieces you’ll wear regularly.
Never use standard acrylic craft paint without a fabric medium — it dries stiff and cracks within a few washes.
How to Prep the Surface Before Painting
Surface prep is the step most beginners skip — and the reason paint peels.
- Wash the jacket to remove any factory coating or sizing
- Let it dry completely — damp denim causes paint to bead and bleed
- Stretch the area to be painted over a cardboard insert to prevent bleed-through and keep the surface taut
- Lightly sand with fine-grit sandpaper if the denim has a rough texture
How to Seal Paint So It Doesn’t Crack
Apply 2–3 thin coats rather than one thick one. Let each coat dry fully (30–60 min, or use a hairdryer on low heat).
Once the design is complete and dry, heat-set it by ironing with a pressing cloth on the reverse side for 3–4 minutes. This fuses the paint to the fibers and dramatically extends longevity.
Machine embroidery can help you create professional-quality jacket patches with cleaner stitching and faster production. See our picks for the Best Embroidery Machines for Beginners (2026).
3. Embroidery: Add Texture and a Premium Feel
⭐⭐ Difficulty: Moderate | 💰 Estimated Cost: $10–$25 | 🎨 Style Match: Cottage-core, elevated casual, heritage
To embroider a denim jacket is to invest in it. The result looks expensive, holds up through years of washing, and adds genuine dimensional texture that paint simply can’t replicate.
Basic Stitches Beginners Can Start With
You don’t need to master 40 stitches. Start with these three:
- Running stitch — the simplest; great for outlines and text
- Satin stitch — fills solid shapes; use for flowers, leaves, geometric fills
- French knot — creates textured dots; perfect for flower centers, starfields, and lettering accents
Use embroidery floss (6-strand, split to 3 for finer work) or pearl cotton for chunkier, bolder lines. A size 7 or 8 embroidery needle works well on mid-weight denim.
Hand Stitch vs. Machine Embroidery
Hand embroidery is meditative and requires no equipment beyond a needle, floss, and a hoop. It’s the slow fashion practice at its purest — and the results look organic and artisan.
Machine embroidery is faster and ideal for logos, text, and repeating patterns. If you have a machine with embroidery functions, digitizing a simple design takes under an hour.
Can you embroider a denim jacket by hand? Absolutely. Denim is actually a forgiving fabric for hand embroidery — it’s stable, doesn’t stretch, and holds stitches firmly without needing a stabilizer backing on most designs.
Sashiko-Style Reinforcement Stitching
Sashiko is a Japanese running-stitch tradition originally used to reinforce and repair fabric. On a denim jacket, it serves double duty: it looks stunning and strengthens the garment.
Use white or off-white sashiko thread on darker denim for maximum contrast. Traditional patterns — hemp leaf, waves, tortoiseshell — are widely available as transfer paper patterns. This technique has seen a surge of interest as part of the visible mending and slow fashion movements of 2025.
4. Bleaching and Dyeing Techniques
⭐⭐ Difficulty: Moderate | 💰 Estimated Cost: $10–$30 | 🎨 Style Match: Grunge, vintage, festival
Few techniques are as dramatic or as misunderstood as bleaching denim. Done right, it produces effects that look like they cost hundreds at a boutique. Done wrong, it destroys fabric. Know the difference.
Bleach Splatter for a Grunge Effect
Fill a spray bottle with a 1:1 mixture of bleach and water. Lay the jacket flat outdoors or in a well-ventilated space on a covered surface.
Spritz, flick, or splatter the solution across the jacket — work quickly and step back to assess. The bleach works fast on indigo dye: you’ll see results within 2–5 minutes. Rinse thoroughly with cold water and neutralize with a diluted white vinegar solution to stop the reaction.
The result: a raw, organic splatter pattern that’s impossible to replicate exactly — every jacket is one of a kind.
Tie-Dye Denim: Rubber Band Methods
Tie-dye denim uses a bleach solution (not traditional Procion dye, which doesn’t bond as effectively to denim) or RIT Dye’s color remover for the classic “acid wash” look.
- Twist and rubber-band sections of the jacket tightly
- Submerge in bleach solution for 10–30 minutes depending on desired fade intensity
- Rinse, neutralize, and wash
The tighter the bands, the more contrast. Loose bands create gradient bleed that mimics a tie dye denim effect.
Dip-Dye and Ombre Gradients
For an ombre denim jacket, you’ll need RIT Dye (liquid formula works best) or a color-removing bath for a fade-out effect.
- For a fade-to-light: submerge the jacket progressively, pulling it out section by section over 30–60 minutes
- For a fade-to-color: dip the bottom third of the jacket in a dye bath and gradually raise it as it absorbs
The result is a smooth gradient that looks almost airbrushed.
Safety Precautions When Working With Bleach
This is non-negotiable:
- Work outdoors or in a ventilated space — bleach fumes are harmful
- Wear gloves and old clothes — bleach will damage whatever it touches
- Never mix bleach with ammonia or vinegar — toxic gas
- Keep a bucket of water nearby to dilute any spills immediately
- Rinse with cold water — hot water sets bleach damage
The style and endurance of your denim coat can rely on the time you pick iron-on or sew-on patches. Short link: Read Iron-On vs. Sew-On Patches: Which Lasts Longer?» before starting your customization project.
5. Distressing: The Worn-In Look
⭐ Difficulty: Easy | 💰 Estimated Cost: $0–$5 | 🎨 Style Match: Vintage, rocker, casual cool
A distressed denim jacket DIY project requires almost no supplies — just the right tools and a light touch. The goal is controlled wear, not accidental destruction.
Sandpaper, Cheese Grater, and Box Cutter Methods
How do you distress a denim jacket at home? Three household tools cover most of what you need:
- Sandpaper (80–120 grit): Rub firmly in one direction over seams, pocket edges, collar, and cuffs. Creates a worn, faded look without breaking through the weave
- Cheese grater: Gives a more aggressive, uneven texture — great for elbows and back panels
- Box cutter or seam ripper: Score horizontal lines (following the weave) for a raw-edged, frayed look
Work slowly. You can always distress more — you can’t undo an accidental tear.
How to Distress Without Destroying the Jacket
- Place cardboard inside the area you’re distressing to prevent damage to the other side
- Focus on stress points — seams, collar edges, cuffs — where real wear would naturally appear
- Wash after distressing to soften and settle the raw edges; they’ll fray naturally and look authentic
- Avoid distressing directly over the chest area if you plan to add patches or paint — a rough surface makes adhesion harder
6. Studs, Spikes, and Hardware
⭐⭐ Difficulty: Moderate | 💰 Estimated Cost: $10–$35 | 🎨 Style Match: Punk, rocker, edgy streetwear
Hardware customization is one of the most durable ways to stud a denim jacket — no washing worries, no fading. Metal elements hold up for years and age beautifully.
Punk Aesthetic: Collar and Cuff Studs
Pyramid studs and conical spikes along the collar are the most iconic punk customization. Use a stud setter tool (under $10 at Michaels) for prong-back studs — no sewing required. Push the prongs through the denim from the front and bend them flat on the inside with a screwdriver or the setter tool.
Space studs evenly with a ruler for a clean, intentional look. For a looser, more chaotic aesthetic, vary spacing and mix sizes.
Swapping Out Buttons for Custom Ones
Replacing the original buttons is a subtle but high-impact detail. Vintage brass buttons, custom enamel buttons, or contrast-colored plastic buttons can shift the feel of a jacket dramatically.
Use a seam ripper to remove old buttons and their backing. Sew replacements through all layers using a strong button thread or dental floss for durability.
Adding Chains, Zippers, and Rings
D-rings and O-rings sewn into side seams add utilitarian edge. Decorative zippers applied over existing seam lines give an industrial look without requiring any structural cutting.
Chains are best attached through existing buttonholes or sewn-in D-rings — never glued. Movement and weight will pull a glued chain free within days.
7. Fringe and Fabric Inserts
⭐⭐ Difficulty: Moderate | 💰 Estimated Cost: $5–$20 | 🎨 Style Match: Country-western, festival boho, rocker
Fringe transforms the silhouette of a jacket entirely. It moves with you, catches light, and adds unmistakable personality.
Cutting Fringe from the Hem or Sleeves
Mark a straight cut line with fabric chalk before you start — fringe looks intentional when the cut is clean. Use sharp fabric scissors and cut parallel strips of equal width (roughly 1/2 inch) from the hem upward, stopping at your marked line.
After cutting, wash the jacket once to encourage the fringe to curl and fray naturally. For tighter, more defined fringe, avoid washing and knot the ends instead.
Sewing in Lace, Mesh, or Contrasting Fabric Panels
Fabric insert customization is one of the more advanced techniques but delivers spectacular results. The most popular approach: cut a rectangular or shaped window in the back panel and sew in a panel of embroidered mesh, lace, or contrasting fabric.
Use a denim needle and heavy-duty thread in a color that contrasts intentionally — this is a design feature, not a repair. Pin, baste, then machine-stitch for a clean finish.
8. Pins, Brooches, and Badges
⭐ Difficulty: Easy | 💰 Estimated Cost: $0–$30 | 🎨 Style Match: Indie, vintage collector, maximalist
Pins require zero tools and zero commitment — and they’re back in full force for 2025’s personalization trend.
Building a Brooch Collection on the Lapel
Start with one statement brooch as your centrepiece, then build outward in concentric layers. Mix metals (gold and silver together look intentional, not accidental), vary sizes, and don’t overthink it — organic clustering is part of the aesthetic.
Hunt at thrift stores, estate sales, and your grandmother’s jewellery box. Unusual, mismatched brooches are infinitely more interesting than a curated set from a single brand.
Enamel Pins: How to Arrange Without Damaging Fabric
Enamel pins are lightweight but their backing posts create small holes. To protect the fabric:
- Use rubber clutch backs (better grip, less fabric stress than standard butterfly backs)
- Avoid pin-dense areas on thin or worn denim
- For permanent display, back the interior with a thin piece of iron-on interfacing to reinforce the fabric
Arrange pins in a deliberate cluster on the lapel or in a diagonal column up the chest.
Patch designs for denim jackets Patch design is an area where a strong patch can change up the whole look. Learn to make custom art with How To Design Embroidery Patterns For Free.
9. Fabric Appliqués and T-Shirt Transfers
⭐ Difficulty: Easy–Moderate | 💰 Estimated Cost: $5–$25 | 🎨 Style Match: Graphic, vintage, streetwear
This technique gives you maximum impact for minimal skill. It’s one of the most popular denim jacket refashion approaches because it repurposes things you already own.
Cutting and Sewing a T-Shirt Graphic onto the Back
Most jean jackets have a natural square panel on the upper back defined by the yoke seam — this is the perfect window for a t-shirt graphic.
- Cut the graphic from the t-shirt leaving a 1-inch border
- Trim to fit within the back panel (a few cm smaller than the seam lines)
- Pin in place and sew around the edges — a zigzag stitch prevents fraying and looks intentional
Iron-on hem tape works for a no-sew version, but won’t survive heavy washing.
Heat-Transfer Printing for Photos and Logos
Heat-transfer paper (available at Michaels) lets you print any image from a home inkjet printer onto fabric. For a back panel design jacket featuring a custom photo or original artwork:
- Mirror-print your design on heat-transfer paper
- Cut closely around the image
- Apply with a household iron at high heat (no steam) for 30–60 seconds with firm pressure
- Peel while hot for a seamless edge
Results are vivid but require careful washing — always turn inside out and use cold water.
10. Rhinestones, Sequins, and Beading
⭐⭐ Difficulty: Moderate | 💰 Estimated Cost: $10–$40 | 🎨 Style Match: Glam, Y2K revival, maximalist
Rhinestones and sequins hit differently on denim. The contrast between rugged fabric and glittering embellishment is what makes it work — it’s unexpected and that’s the point.
Glue Gun vs. Sew-On for Longevity
Hot glue is fast but not wash-safe — rhinestones will start popping off after the first machine wash. For longevity:
- Use fabric glue (E6000 or similar) for individual rhinestones — it’s flexible and water-resistant
- Sew beads and sequins individually with a beading needle and thread for anything that will be washed frequently
- Flat-back hotfix rhinestones applied with a rhinestone setter tool (a small heat applicator) bond to fabric via heat and are significantly more durable than glued versions
Spelling Out Words with Rhinestones
Trace your text lightly in fabric chalk first. Working letter by letter with tweezers and fabric glue, place stones individually. Allow 24 hours of cure time before wearing — move the jacket as little as possible during drying.
For large words across the back, plan the layout on paper first, measure the spacing, and transfer to the jacket with chalk guidelines.
Print on demand services can increase your business scale when you are designing custom denim apparel for a brand or your own online store Distinguish from the cream of the crop in comparison matrix for Best Print-on-Demand Platforms for Custom Merch.
11. Structural Alterations: Cropping, Slashing, and Cut-Outs
⭐⭐⭐ Difficulty: Advanced | 💰 Estimated Cost: $0–$15 (or tailor fees) | 🎨 Style Match: Fashion-forward, avant-garde, Y2K
Structural changes are permanent, so this category demands the most thought — but delivers the most transformative results.
How to Crop a Denim Jacket Cleanly
Decide your desired length and mark it with fabric chalk and a ruler. Cut 1 inch below your final length line to allow for a rolled hem or raw hem finish.
- Raw hem: Cut at the final line, wash once to encourage fraying, and leave as-is
- Rolled hem: Fold twice (1/4 inch each) and topstitch with a straight or decorative stitch
Denim is unforgiving — measure twice, cut once, and try the jacket on before making any cuts.
Open-Back and Lattice-Cut Designs
Open-back designs involve cutting the back panel into geometric shapes, strips, or a single window and either leaving it open or inserting contrasting fabric. Mark all cuts with chalk and use sharp, heavy-duty scissors or a rotary cutter for clean lines.
Lattice cuts — horizontal slashes through which the lining or skin shows — are best achieved with a ruler and box cutter on a cutting mat. Reinforce cut edges with a fray-stopping liquid (like Dritz Fray Check) to prevent runaway unraveling.
When to Visit a Tailor vs. DIY
Some structural changes are genuinely better left to a professional:
- Taking in the side seams — denim is thick; an uneven seam is obvious and hard to fix
- Shortening sleeves — requires matching cuff attachment, which is complex
- Inserting zippers structurally — functional zippers in new locations need professional finishing
A tailor can typically handle these adjustments for $15–$50, which is worth it to preserve an expensive or sentimental jacket.
How to Care for Your Customized Denim Jacket
You’ve invested time and creativity — now protect it. Caring for a customized jacket is different from standard denim care.
Washing Rules for Painted and Embroidered Jackets
- Always turn inside out before washing — this protects painted surfaces and embroidery from abrasion
- Use cold water and a gentle cycle — heat degrades fabric paint and weakens patch adhesives
- Hand wash if possible for heavily embellished pieces — especially those with rhinestones, beads, or heat transfers
- Use a mild, dye-free detergent — harsh detergents fade both denim and painted designs
- Never machine wash a jacket with loose hardware (chains, rings) — the metal will damage the drum and other clothes
How do I wash my denim jacket after customizing? Cold water, gentle cycle, inside out — and when in doubt, hand wash.
Storage Tips to Preserve Embellishments
- Hang, don’t fold — folding cracks painted designs over time and puts stress on embroidered areas
- Store in a cool, dry place away from direct sunlight (UV fades both denim and paint)
- For jackets with beading or rhinestones, stuff the sleeves lightly with tissue paper to maintain shape and prevent stones from pressing against each other
Ironing Safely Over Custom Designs
Never iron directly over paint, rhinestones, heat transfers, or iron-on patches.
- Place a cotton pressing cloth between the iron and the design
- Use low to medium heat — high heat melts rhinestone coatings and degrades adhesives
- Iron on the reverse side wherever possible
- Allow freshly ironed areas to cool before folding — hot fabric is more prone to crease damage
Common Mistakes to Avoid
Even experienced DIYers make these errors. Knowing them in advance saves a jacket — and a lot of frustration.
Over-Embellishing: Knowing When to Stop
The most common mistake is trying to do everything at once. Patches + paint + studs + rhinestones + fringe on a single jacket almost always looks chaotic rather than curated.
Choose one or two primary techniques and let them breathe. A jacket with a single, stunning hand-painted back panel and clean collar studs is far more impactful than one buried under fifteen competing ideas.
Edit ruthlessly. Great customization knows what to leave out.
Using the Wrong Paint or Glue on Denim
- Standard acrylic craft paint without fabric medium cracks and peels — always use fabric-specific formulas (Tulip, Tarrago, or Blick’s fabric acrylics)
- Hot glue is not wash-safe — use E6000 fabric glue or sew embellishments for anything beyond a one-wear piece
- Super glue and school glue have no place on fabric — they stiffen denim and eventually flake off
Skipping a Test Patch First
Before applying any paint, bleach, or dye to the full jacket, test on a hidden interior seam or a fabric scrap from the same jacket (if you’ve made any cuts).
Bleach reacts differently on different denim blends. Paint can look different once dried vs. in the bottle. A 10-minute test saves a 3-hour project.
Frequently Asked Questions
What kind of paint do you use on a denim jacket?
How do I keep iron-on patches from falling off?
Can I machine wash a customized denim jacket?
How do I customize a denim jacket without sewing?
- Iron-on patches and heat-transfer prints
- Fabric paint and stencils
- Pins, brooches, and enamel badges
- Rhinestones applied with fabric glue or a hotfix setter
- Bleaching and dyeing techniques
- Studs with prong backs (set with a tool, no sewing)
What is the easiest way to personalize a jean jacket?
Summary: Your Denim, Your Rules
Learning how to customize a denim jacket is one of the most rewarding things you can do with an afternoon and a thrift store find.
Start simple — a cluster of patches, a hand-painted detail, a set of studs — and build your skills with each piece. The techniques in this guide scale from absolute beginner to genuinely advanced, so there’s always a next challenge once you’ve mastered the basics.
The best jacket you’ll ever own is the one you made yourself.